OPAC
Suchergebnisse
Sie können Ihre Suchbegriffe entweder direkt in das Suchfeld eintippen, oder Sie klicken auf den Link ‚Erweiterte Suche‘, um eine detailliertere Suche durchzuführen.
Mehr Informationen zur Suche erhalten Sie in dem Kapitel ‚Suche‘ in diesem Handbuch.
Suchergebnisse
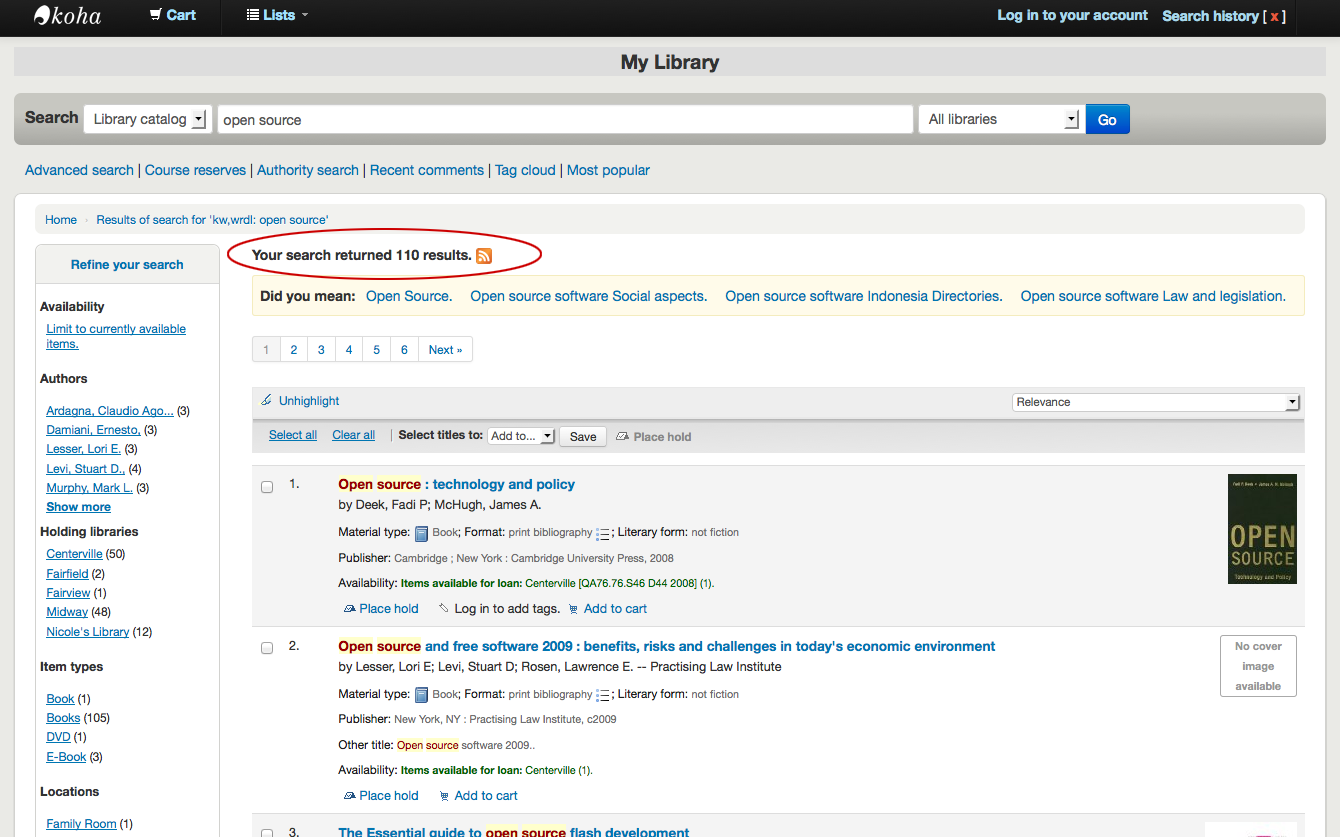
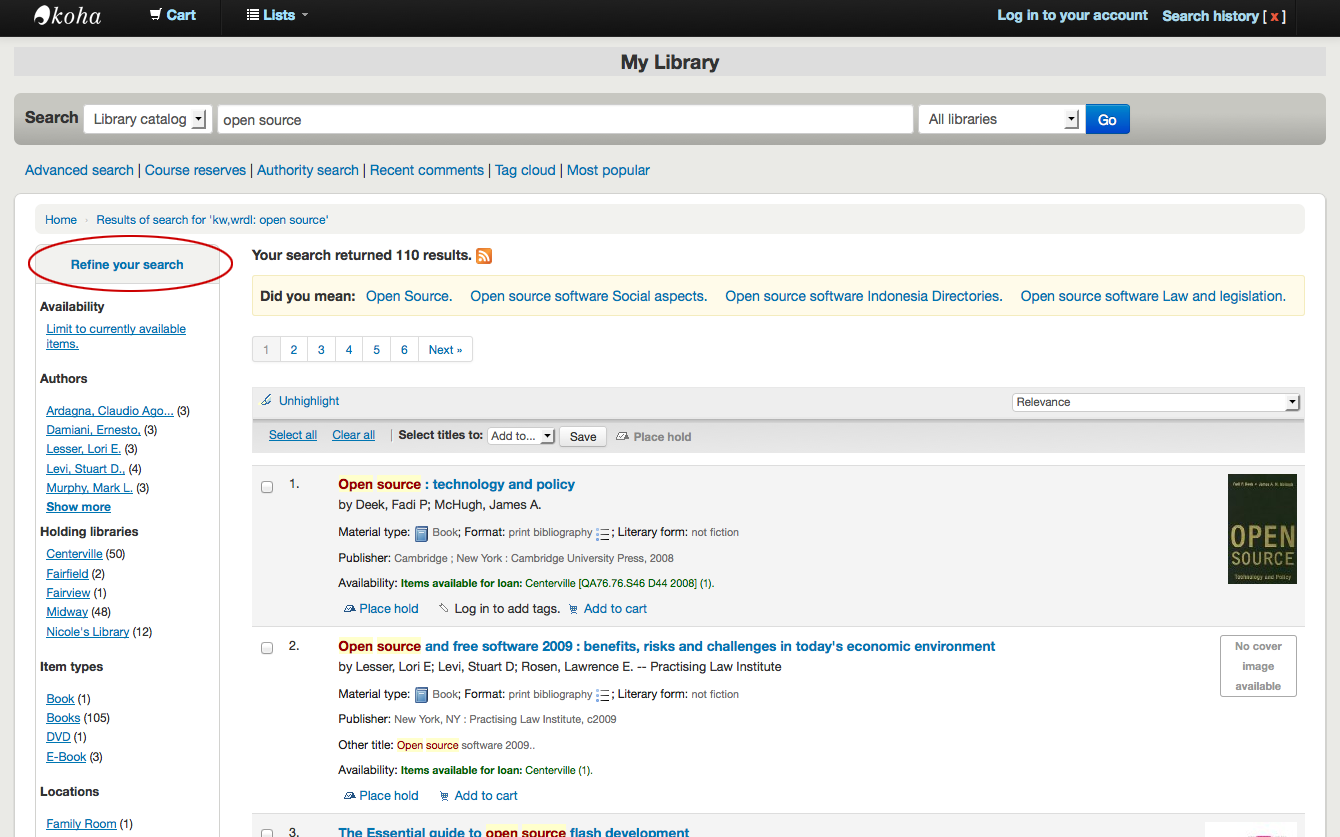
Nachdem Sie eine Suche durchgeführt haben, erhalten Sie die Anzahl der Treffer oberhalb der Trefferliste
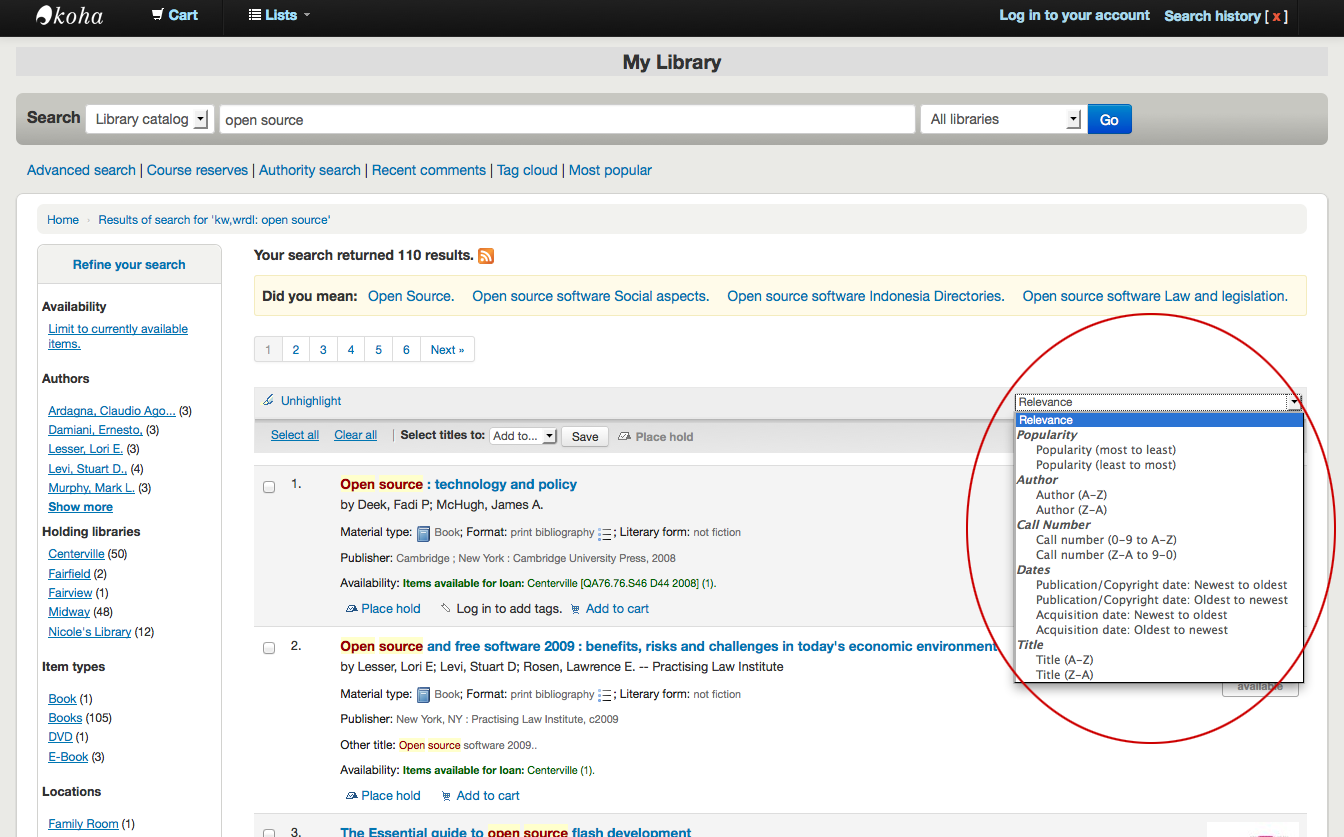
Standardmäßig werden Ihre Suchergebnisse anhand der Einstellungen in den Systemparametern OPACdefaultSortField und OPACdefaultSortOrder sortiert. Über die Auswahlliste auf der rechten Seite können Sie die Suchergebnisse umsortieren.
Unterhalb des Titels bei jedem Treffer in der Trefferliste erscheinen die Einträge aus dem Leader-Feld des zugrunde liegenden MARC-Satzes. Diese Einträge sind unabhänig von den Medientypen oder den Sammlungen die bei Ihnen vorhanden sind. Die Anzeige kann über den Systemparameter DisplayOPACiconsXSLT gesteuert werden.
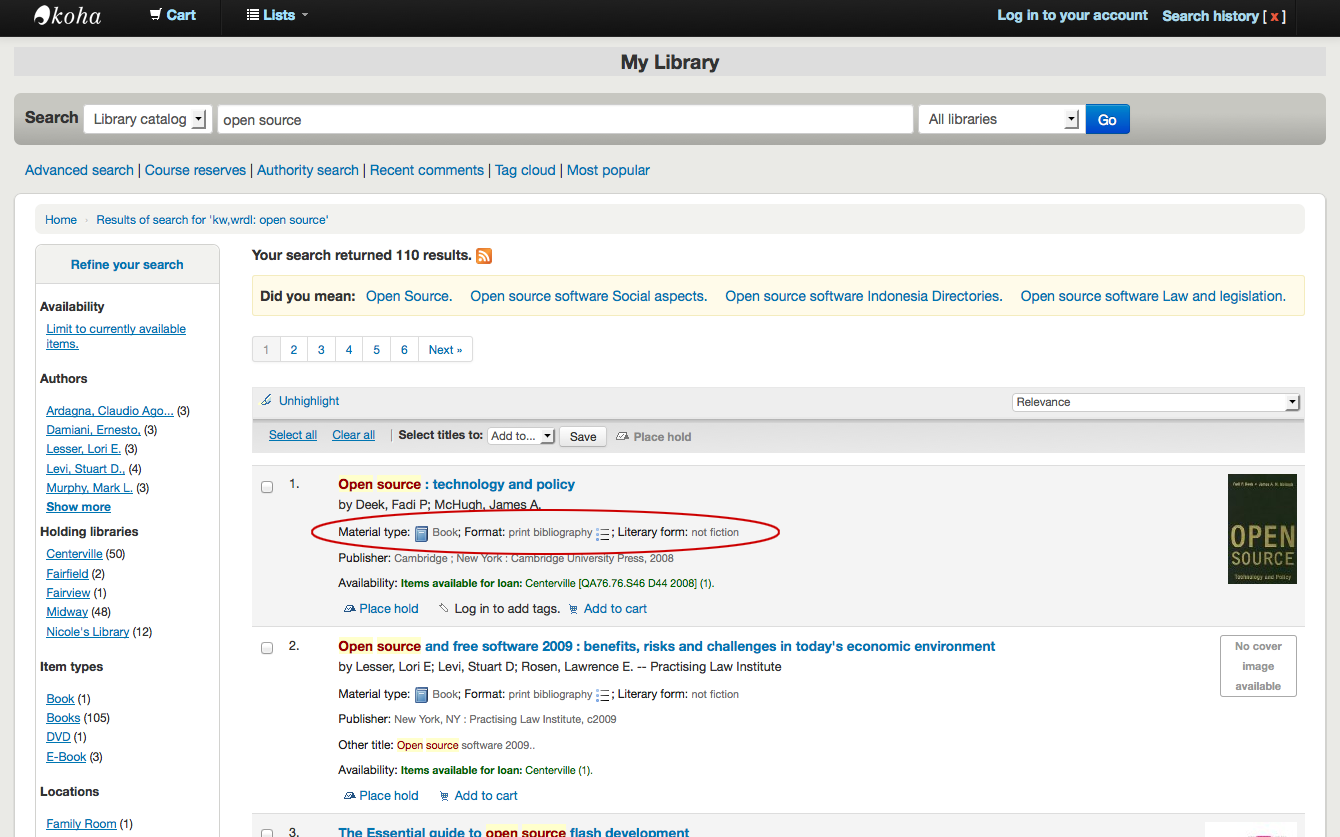
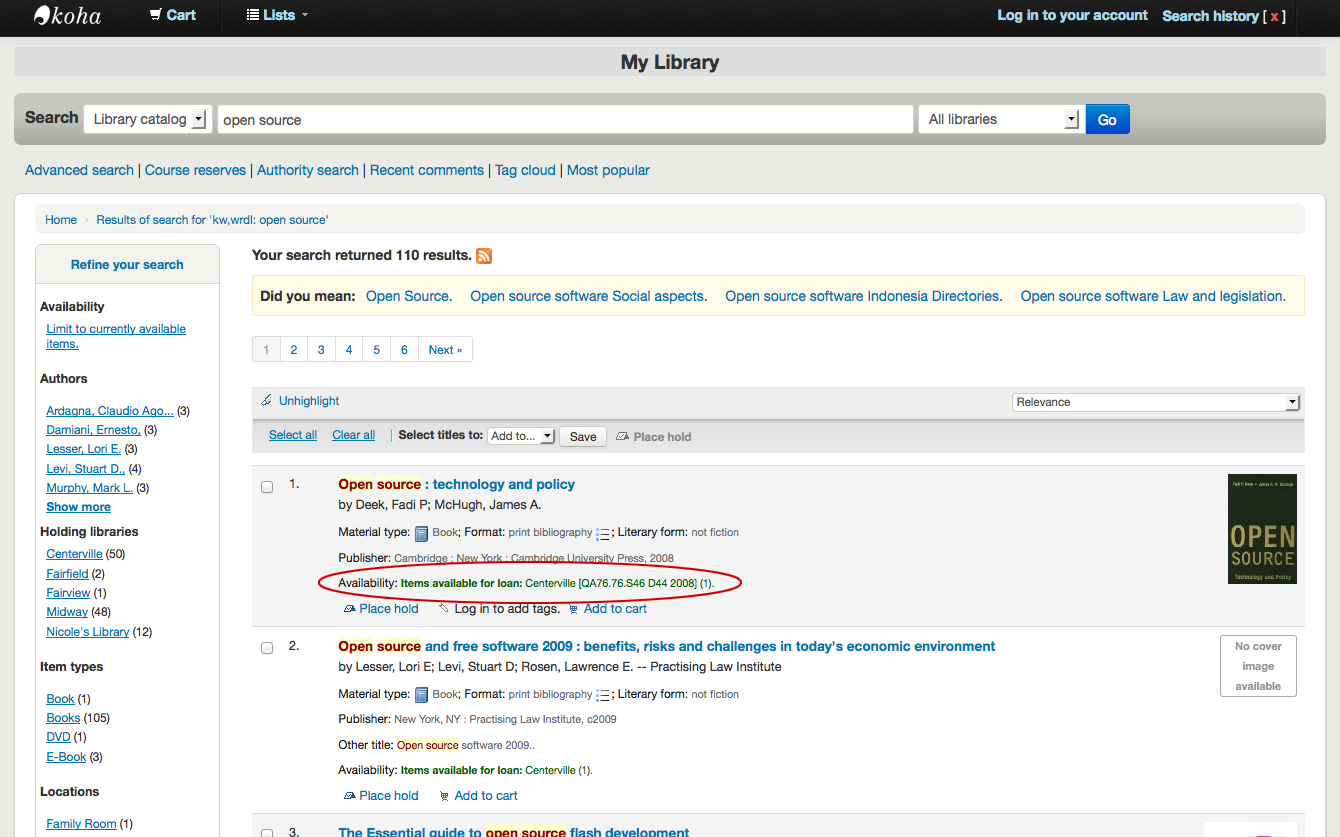
Unterhalb der einzelnen Titel sehen Sie die Verfügbarkeitsanzeige der Exemplare.
Hinweis
Auch wenn Sie Ihre Suche auf einen Bibliotheksstandort eingeschränkt haben, erscheinen alle Standorte der Exemplare in den Suchergebnissen.
Wichtig
Der Vormerkstatus eines Exemplars hat solange keinen Effekt ob das Exemplar ‚verfügbar‘ ist, bis es den Status ‚Bereitgestellt‘ hat. Auch Exemplare mit Vormerkungen auf verfügbare Titel erscheinen solange als verfügbar, bis ein Exemplar zurückgebucht wurde um es auf ‚Bereitgestellt‘ zu setzen.
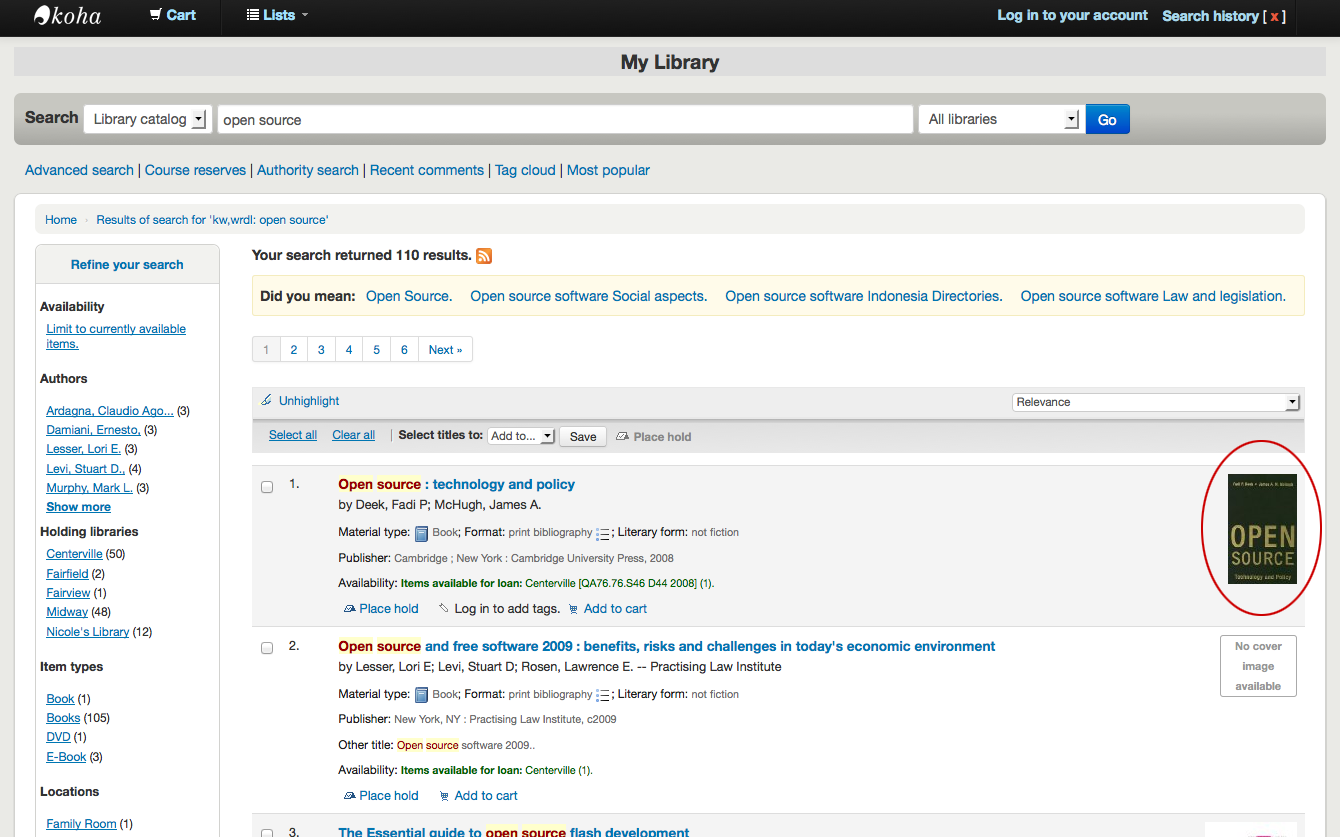
If you have turned on Enhanced content system preferences preferences you may have book jackets on your search results.
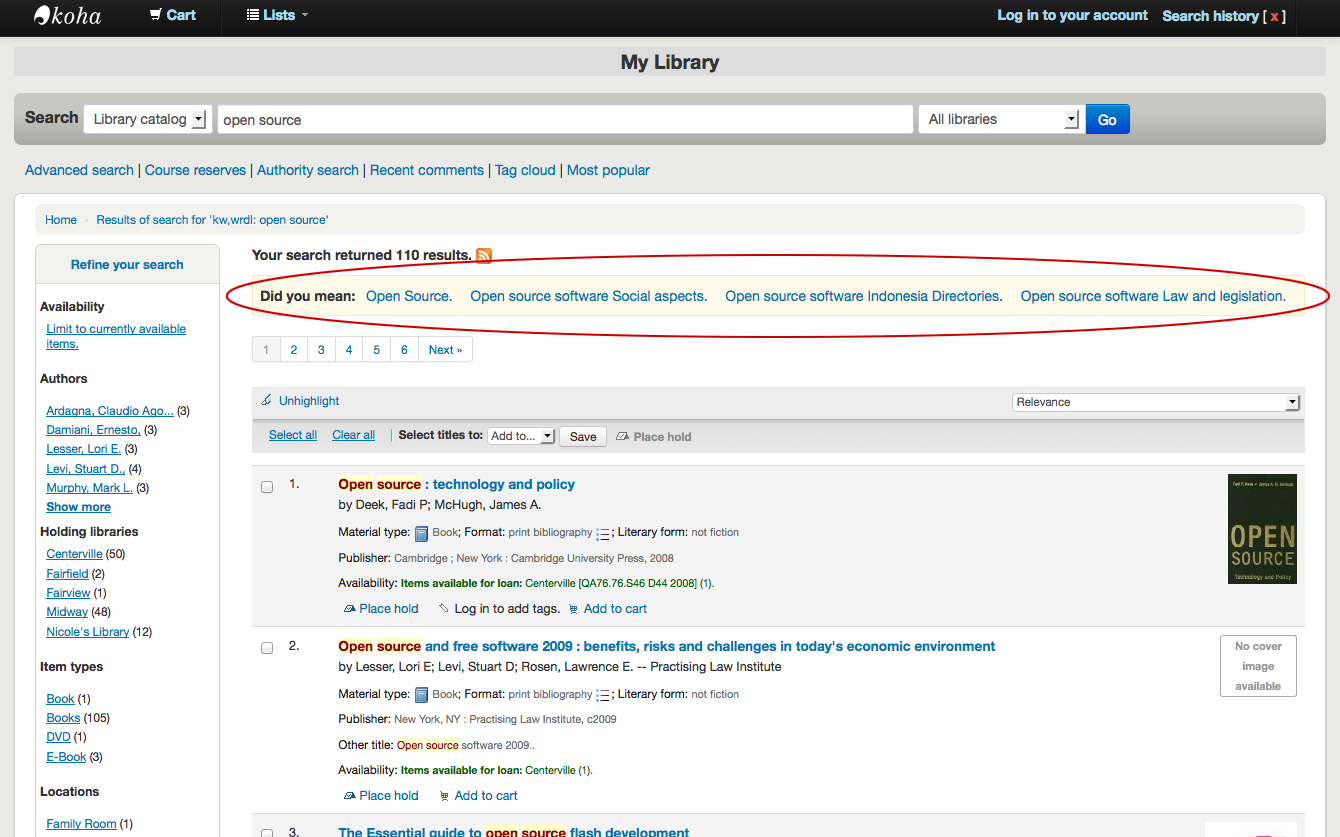
Wenn Sie die Einstellung Meinten Sie? entsprechend gesetzt haben, erhalten Sie oberhalb der Trefferliste eine gelbe Leiste mit weiteren Suchbegriffen.
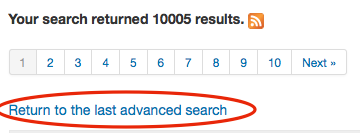
Wenn Sie eine erweiterte Suche durchgeführt haben, erhalten Sie einen Link ‚Zurück zur letzten Erweiterten Suche‘ um die Suche anzupassen.
Filter
Mit den Links unter dem Bereich ‚Präzisieren Sie die Suche‘ können Sie Ihre Suchergebnisse verfeinern.
Abhängig vom Systemparameter DisplayLibraryFacets werden Facetten für Ihre Heimatbibliothek, aktuelle Bibliothek, oder beide angezeigt.
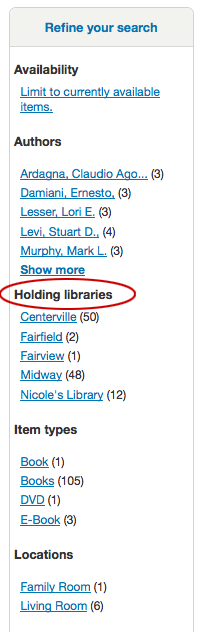
Nachdem Sie auf eine Facette geklickt haben, können Sie diese auch wieder entfernen indem Sie auf das kleine ‚x‘ rechts neben der der Facette klicken.

RSS Feeds für Suchen
Sie können Ihre Suchergebnisse über einen RSS Feed abonnieren indem Sie auf das RSS Feed Icon rechts neben der Anzahl der Suchergebnisse klicken. Mehr Informationen zu RSS Feeds erhalten Sie in diesem Video <http://www.youtube.com/watch?v=0klgLsSxGsU>`__.
Wenn Sie die Suchergebnisse abonnieren, können Sie sehen wenn für diese Suchergebnisse neue Exemplare hinzugefügt werden.
Bibliographischer Datensatz
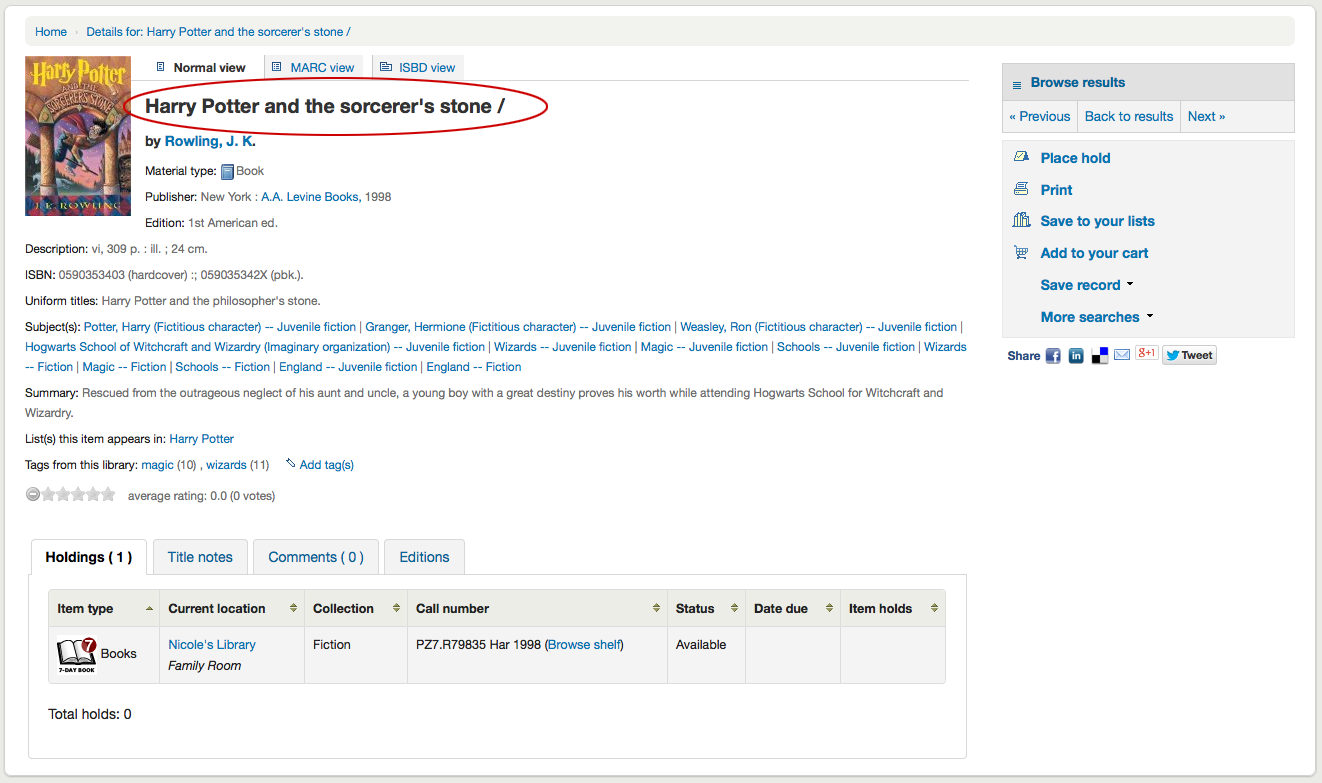
Wenn Sie auf einen Titel aus der Trefferliste klicken gelangen Sie in die Detailansicht des Titels. Die Detailansicht ist in verschiedene Bereiche aufgeteilt.
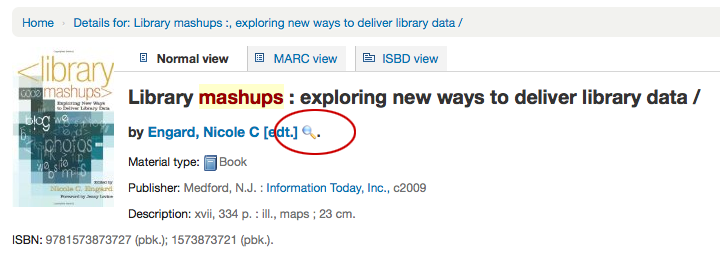
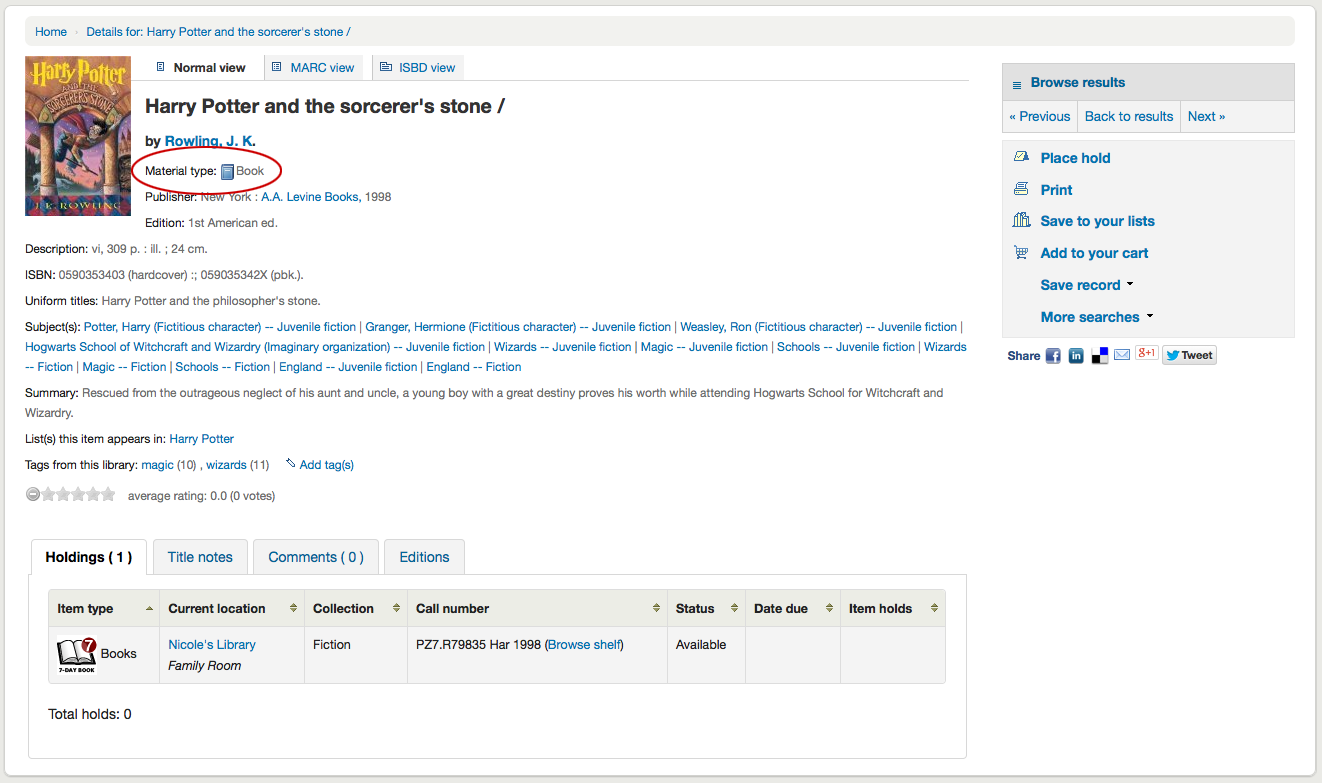
Im oberen Bereich des Bildschirms befindet sich der Titel und die Materialart:
Unterhalb des Titels werden die Autoren aufgeführt. Diese stammen aus den 1xx und 7xx MARC-Feldern. Wenn Sie auf einen Autor klicken, wird eine Suche ausgeführt und Sie erhalten Sie eine Liste mit allen Titeln von und mit dieses Autors.
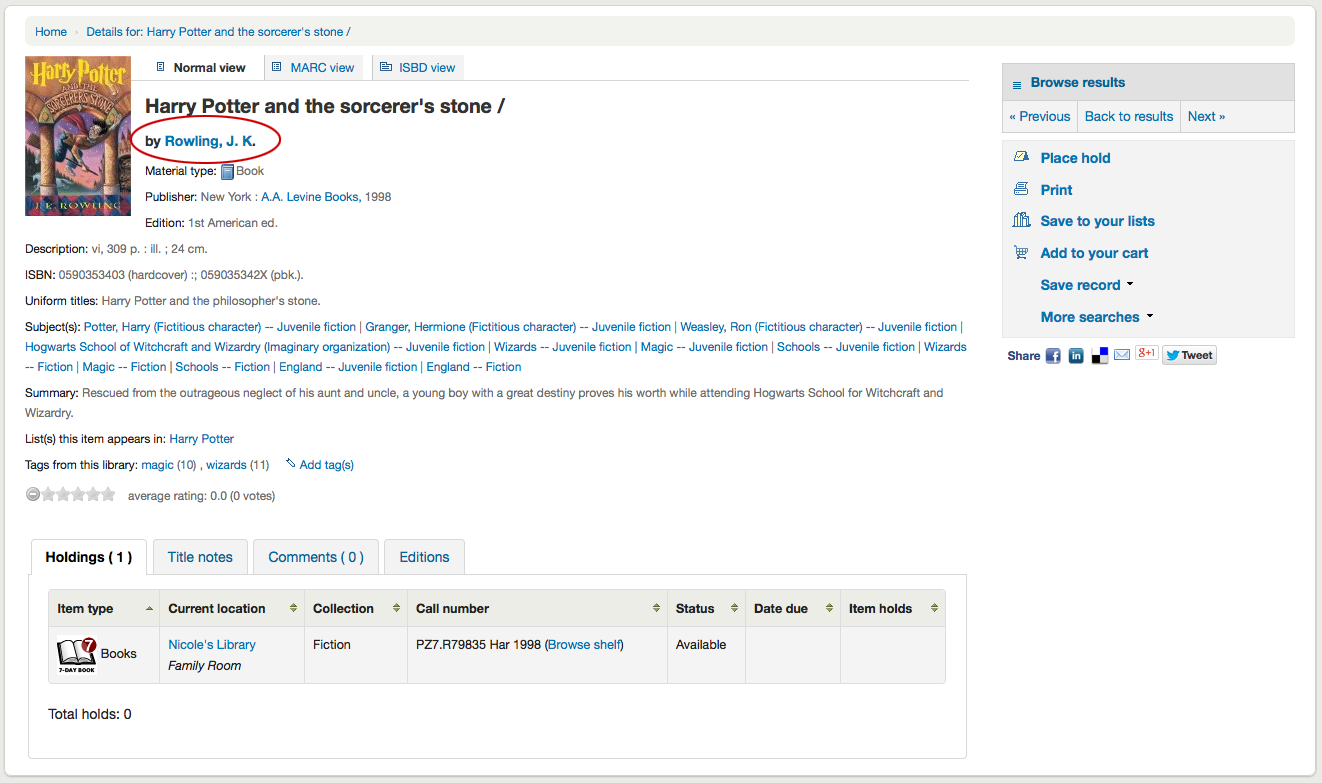
Wenn es sich um Normdaten handelt, sehen Sie neben dem entsprechenden Autor (oder einer anderen Normdatenart) eine Lupe. Wenn Sie auf die Lupe klicken, gelangen Sie direkt auf den Normdatensatz.
Wenn Sie den Systemparameter DisplayOPACiconsXSLT auf ‚Zeige‘ gesetzt haben, wird das Format, die Zielgruppe und Materialtypicons in der Trefferliste und der Detailansicht des OPACs angezeigt (hier erfahren Sie mehr über Materialtypicons.)
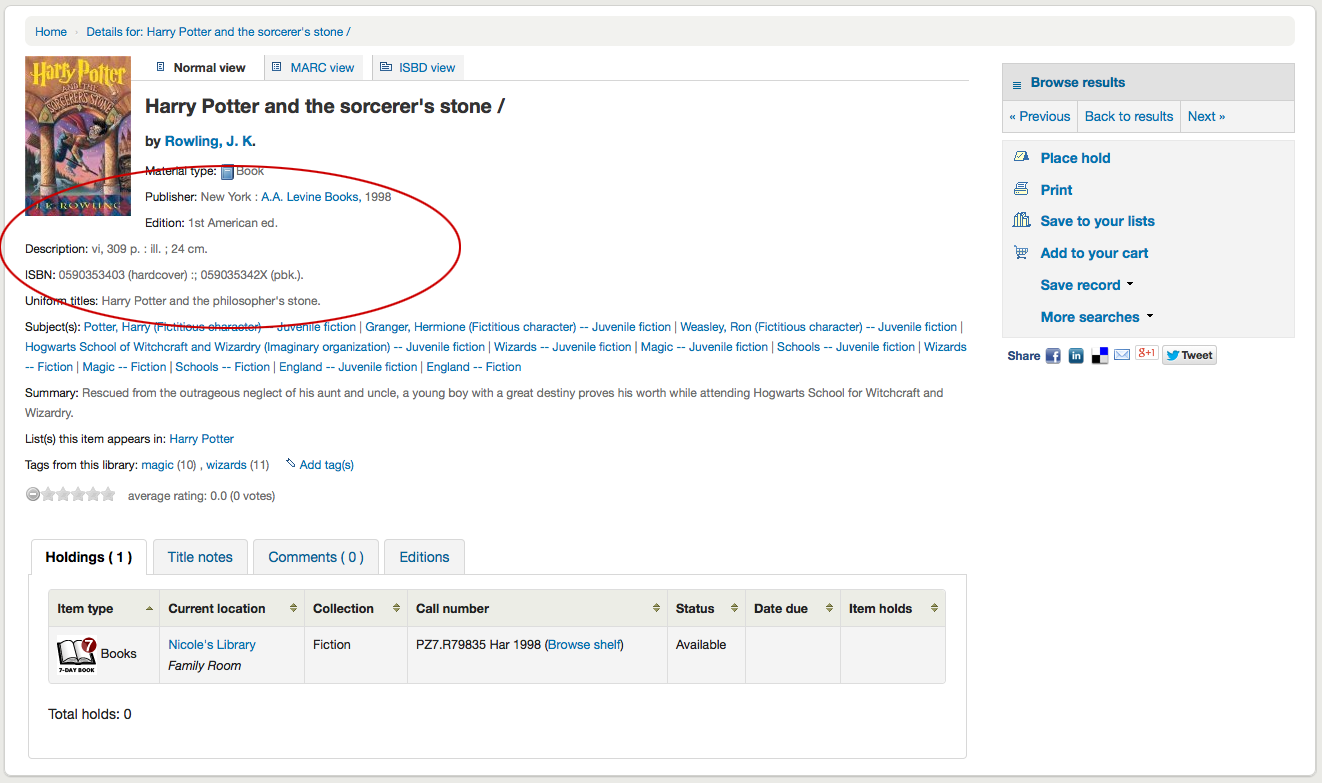
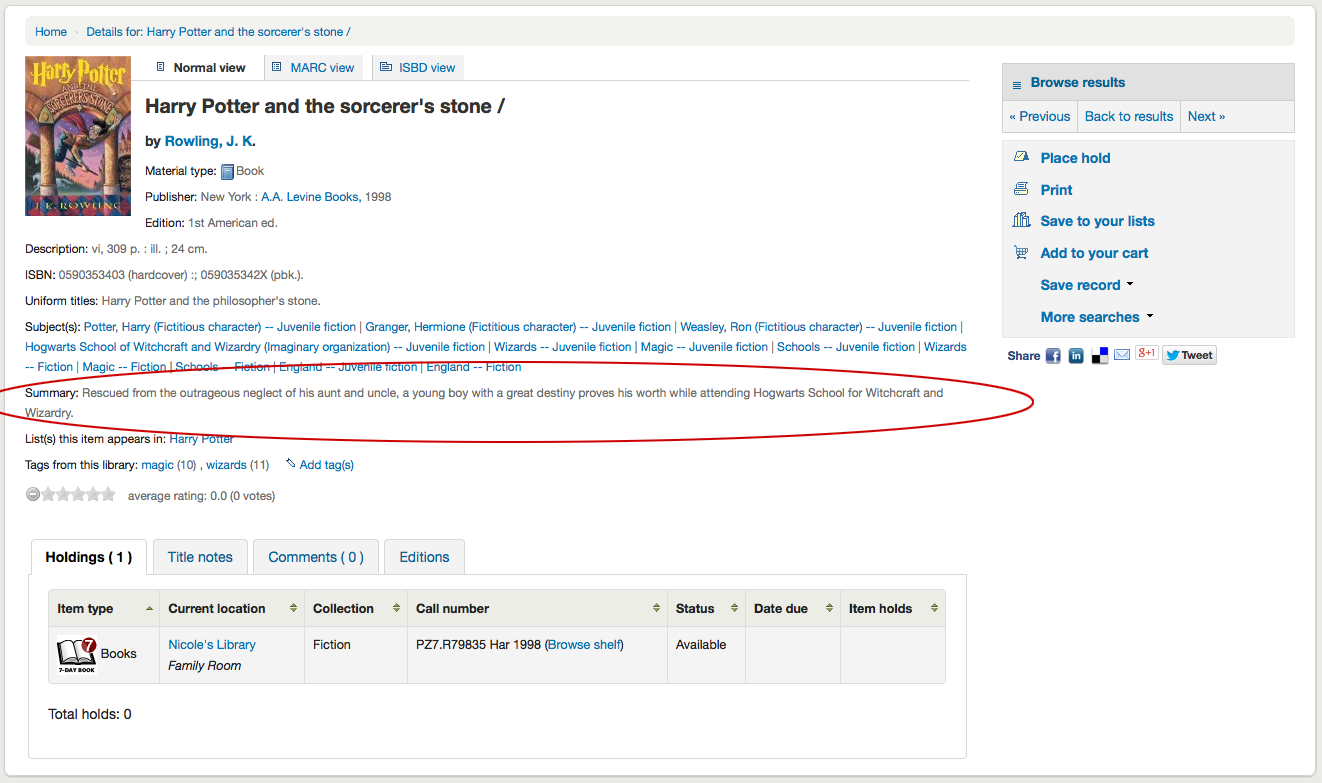
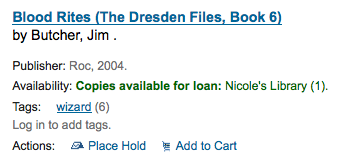
Hier sehen Sie die Beschreibung des Titelsatzes:
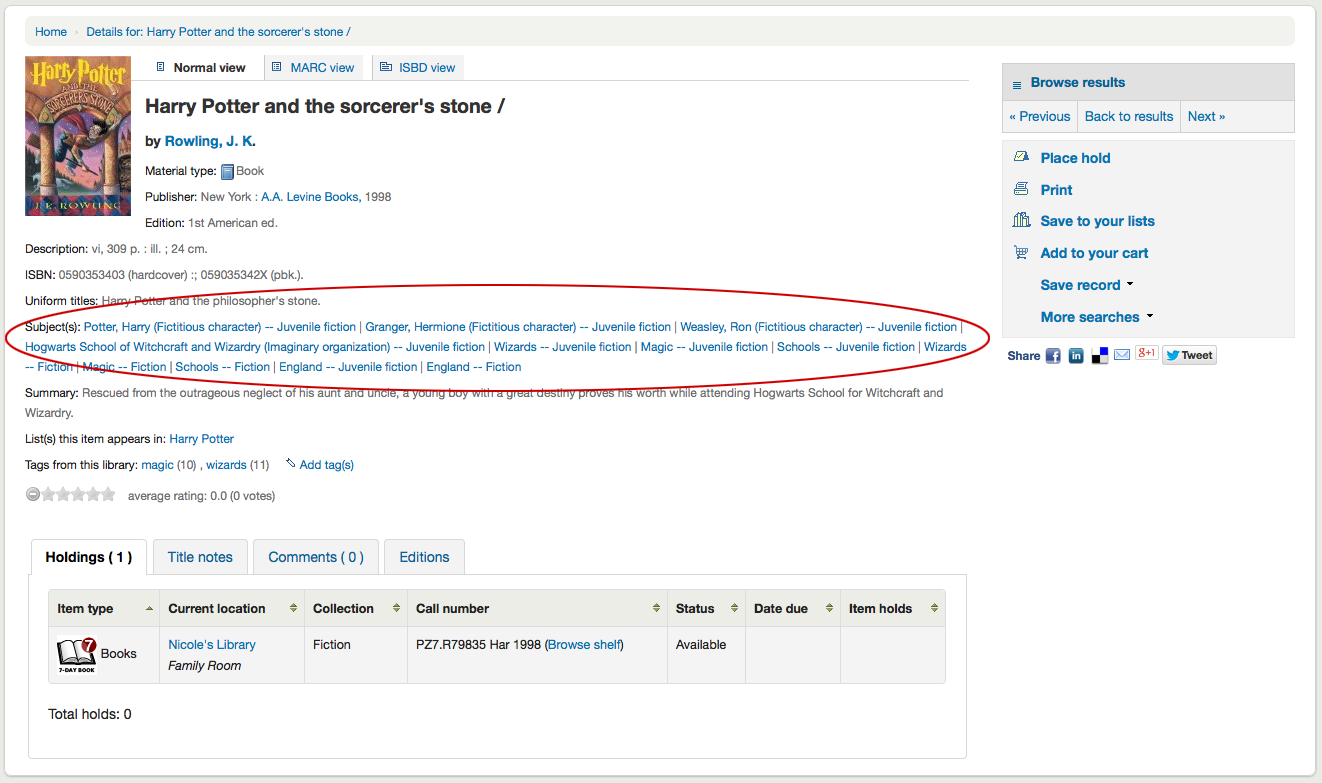
Wenn Sie auf die Schlagwörter klicken, wird eine Suche nach Titeln mit diesem Schlagwort durchgeführt
Wenn der Titelsatz eine Inhaltsangabe und / oder eine Zusammenfassung hat, erscheinen diese hier ebenfalls.
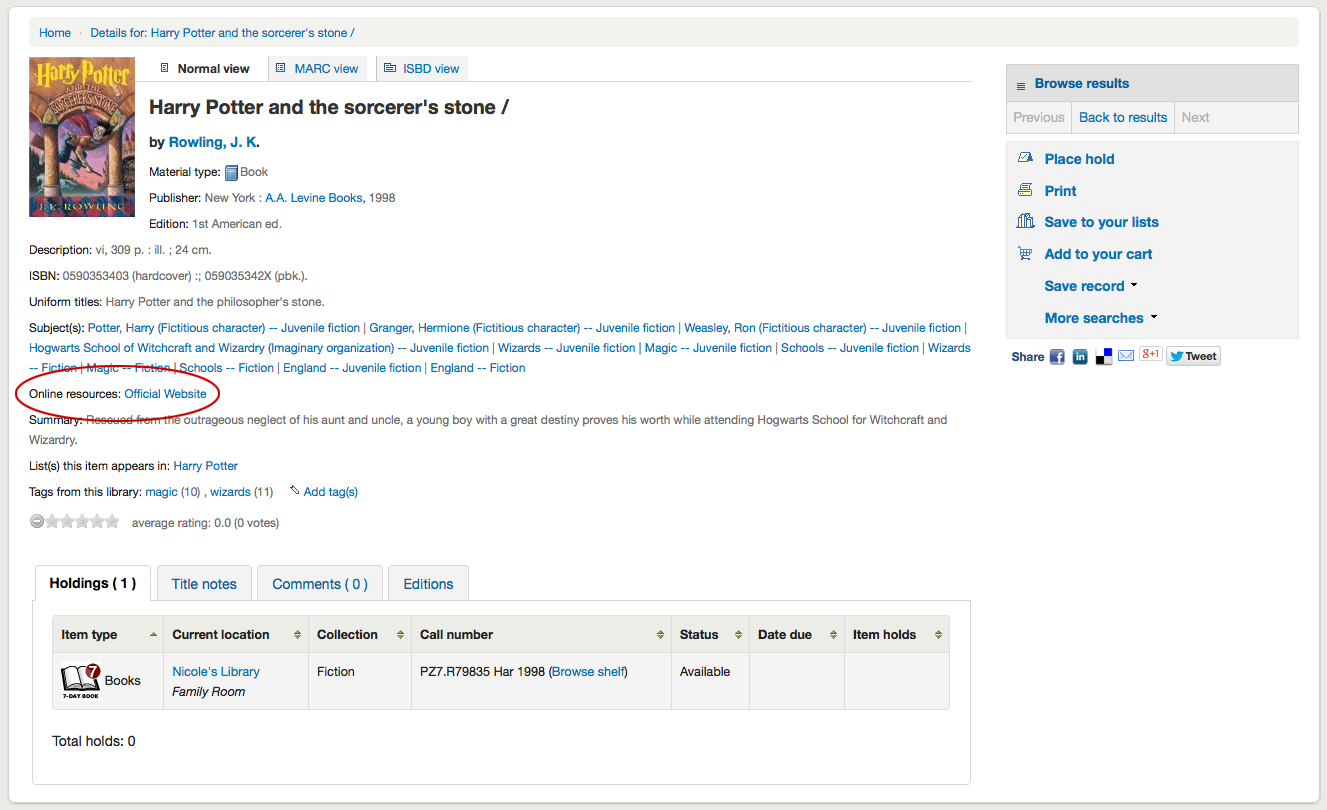
Wenn Daten in den MARC-Feldern 856 vorhanden sind, werden entsprechend Links unter der Rubrik ‚Online-Ressourcen‘ angezeigt.
Wenn der Titel in einer öffentlichen Liste enthalten ist, erscheint die Rubrik ‚Listen, auf denen dieser Titel steht:‘ mit dem Namen der Liste. Darüber hinaus werden ‚Tags dieser Bibliothek‘ angezeigt, wenn diese entsprechend vorhanden sind

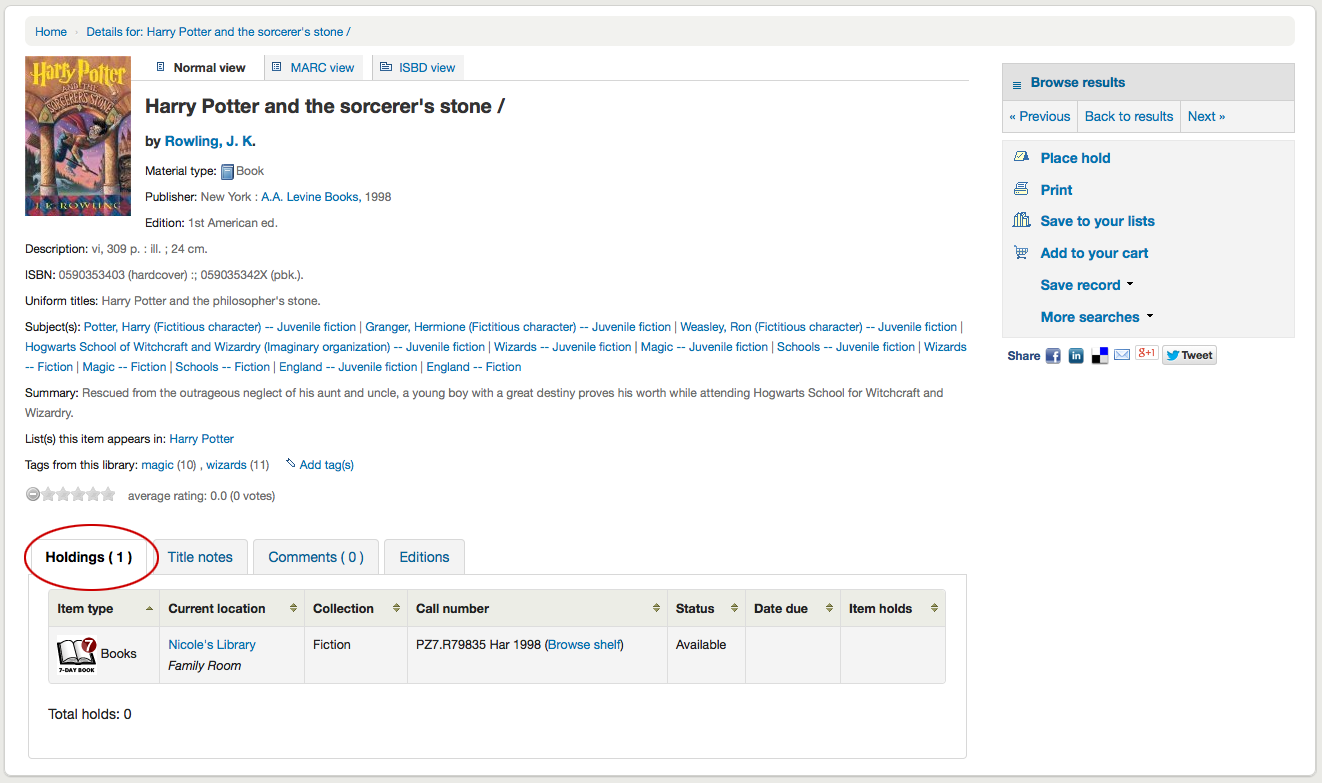
In den Reitern unterhalb des Titelsatzes befinden sich die Exemplarangaben
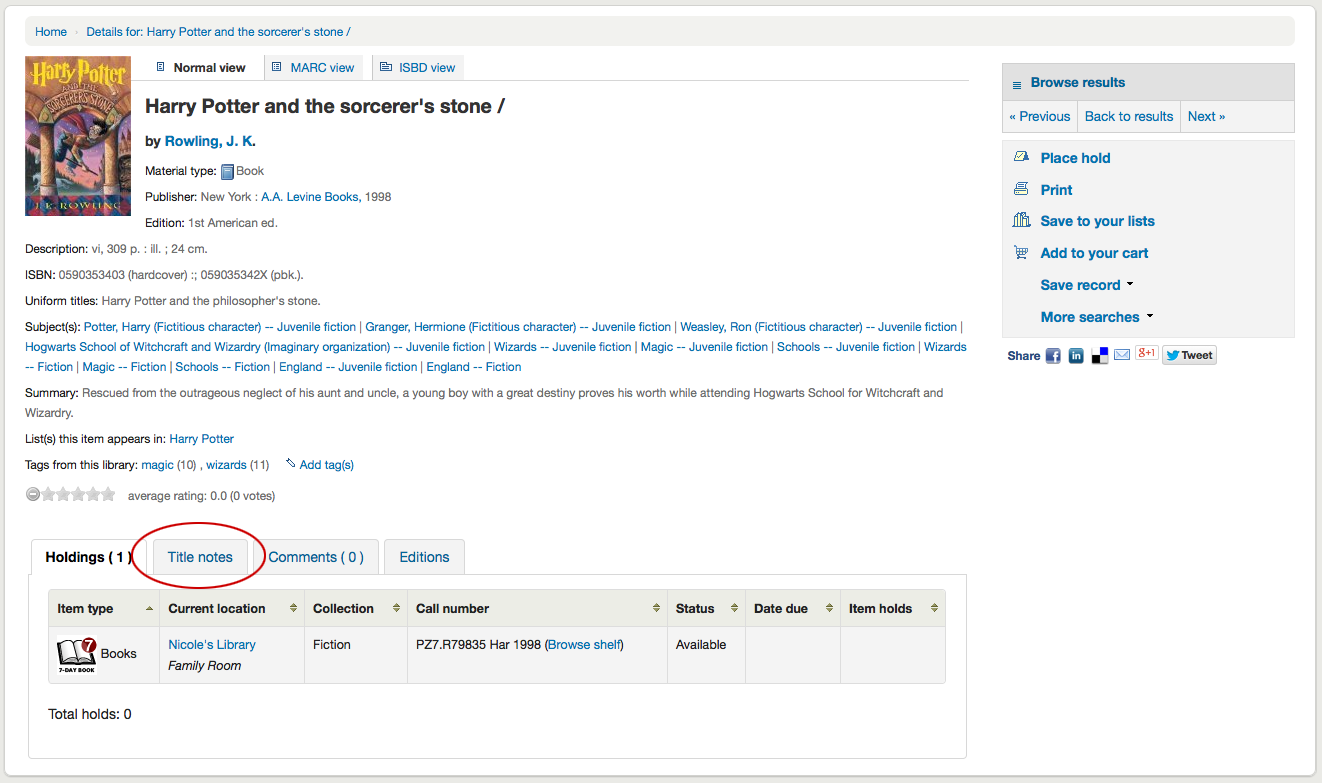
Wenn Notizfelder (MARC Felder 5xx) erfasst wurden, erscheinen die Angaben unter ‚Titelinformationen‘
Wenn Sie die Kommentarfunktion zulassen, erscheinen Kommentare hier im nächsten Reiter

Und wenn Sie die FRBR Parameter aktiviert haben, erhalten Sie andere Ausgaben des Titels unter dem Reiter ‚Ausgaben‘ angezeigt, wenn es welche gibt.

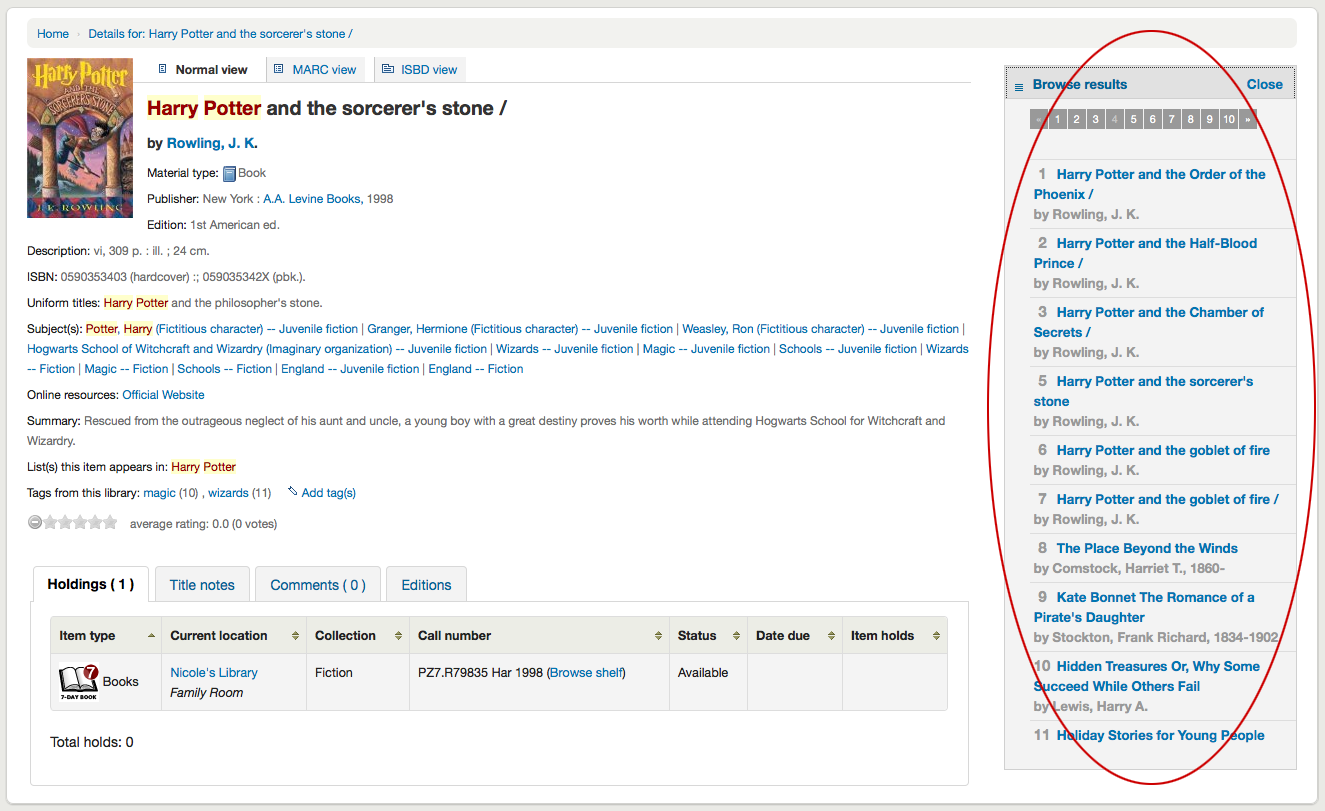
Rechts neben den Titelangaben befinden sich Boxen mit verschiedenen Optionen. Die erste Box hilft Ihnen durch die Trefferliste zu navigieren. Von dort können Sie auch zum nächsten oder vorherigen Treffer, oder zu Ihrer Trefferliste gelangen.
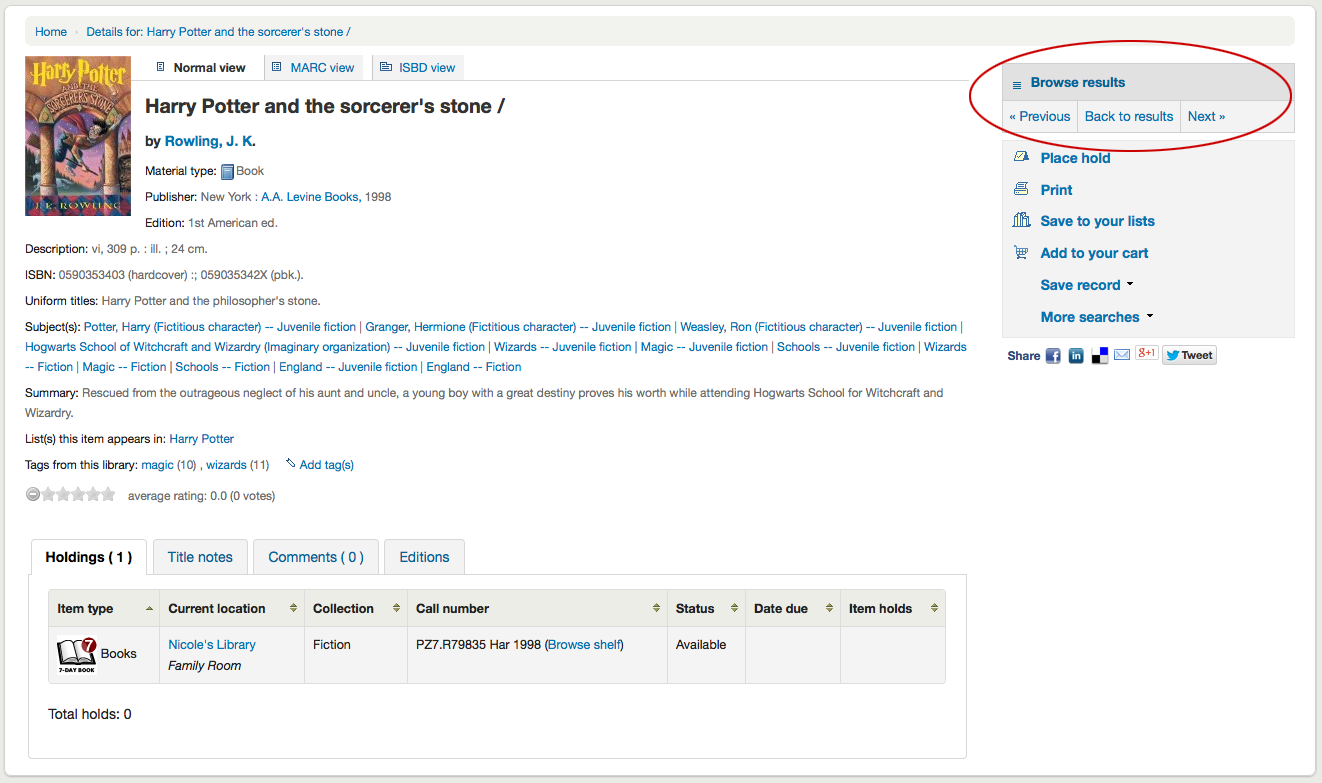
Wenn Sie auf ‚Trefferliste durchstöbern‘ klicken erhalten Sie eine verkürzte Trefferliste Ihrer Suchergebnisse direkt auf der Detailansicht
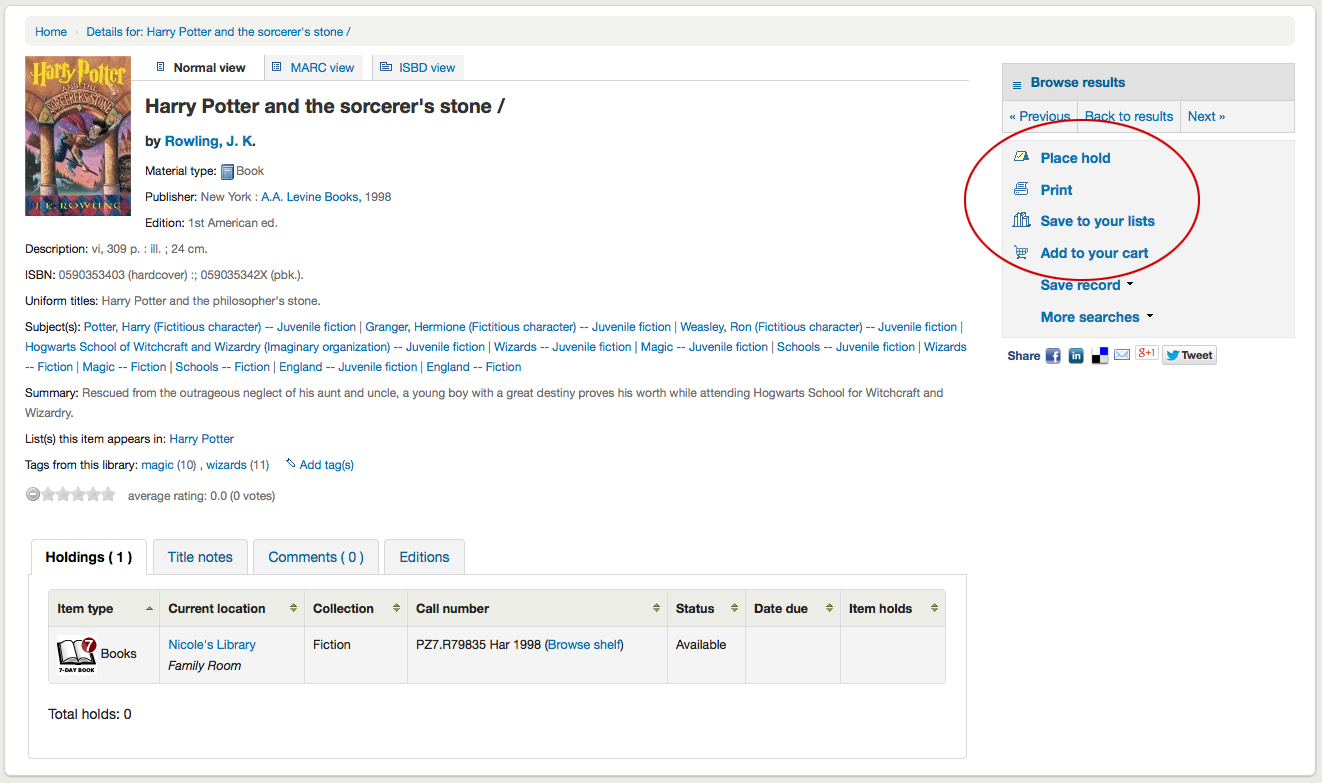
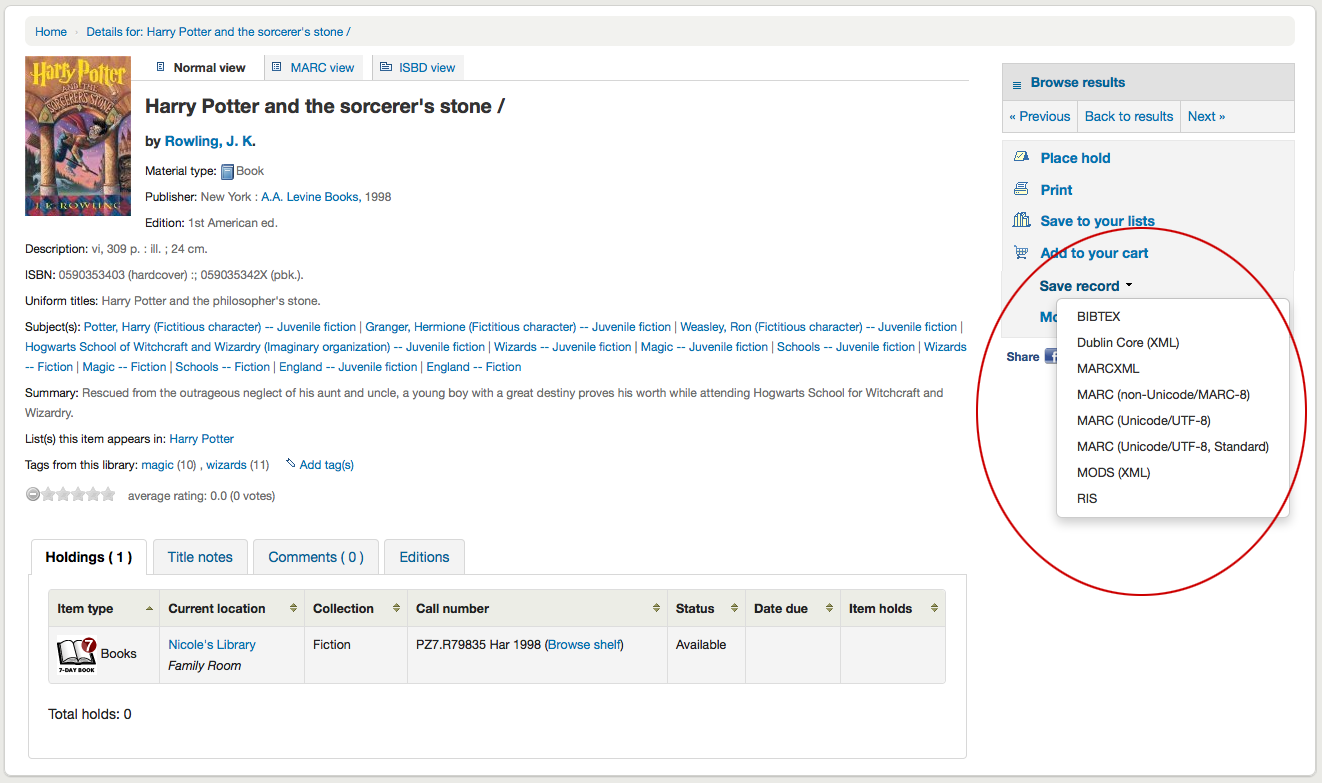
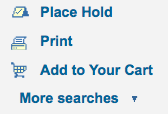
Darunter finden Sie Links um eine Vormerkung abzusetzen, den Titelsatz zu drucken, den Satz zu Ihren Listen oder zu Ihrem Korb hinzuzufügen
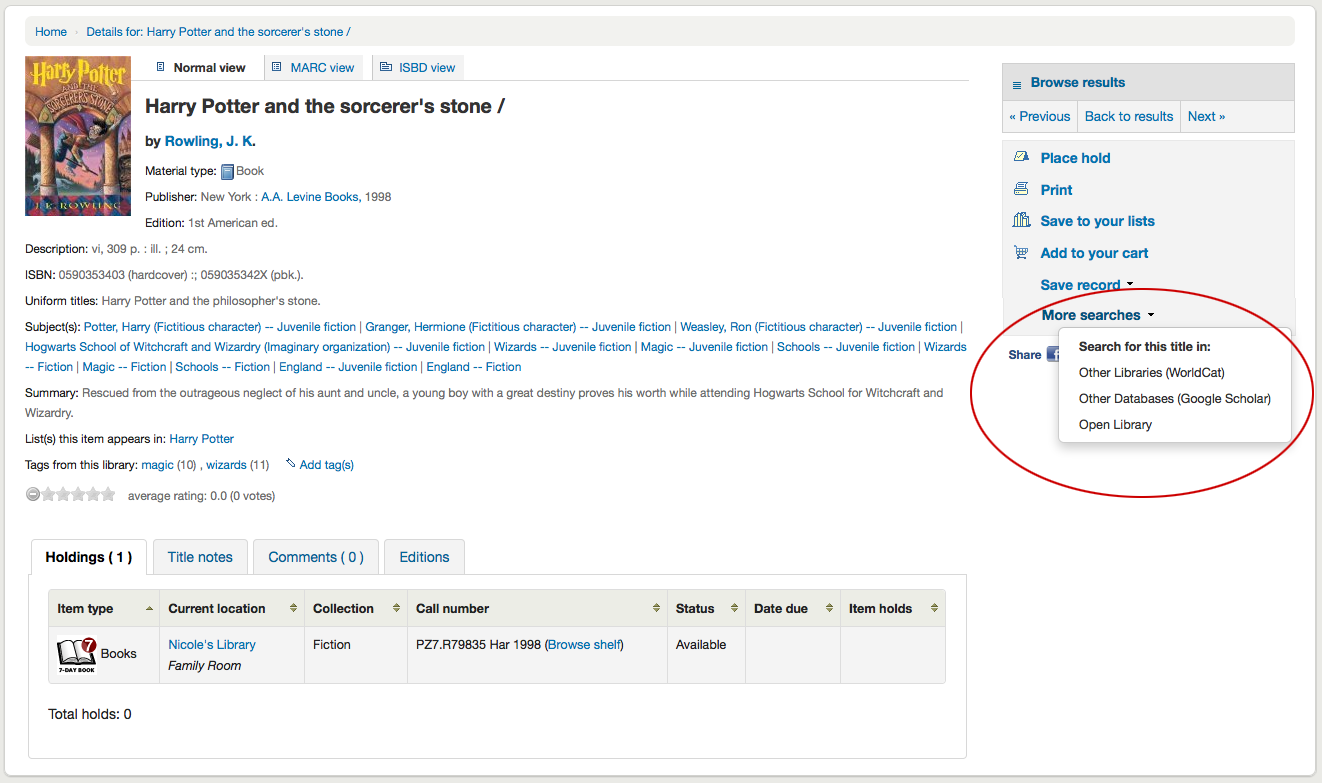
Unter dem Link ‚Weitere Suchen‘ erhalten Sie eine Liste von Suchquellen, in denen nach diesem Satz gesucht werden kann. Die Liste kann in dem Systemparameter OPACSearchForTitleIn angepasst werden.
Unter dem link ‚Datensatz speichern‘ öffnen sich verschiedene Formate unter denen der Titelsatz abgespeichert werden kann. Die Liste kann über den Systemparameter OpacExportOptions angepasst werden.
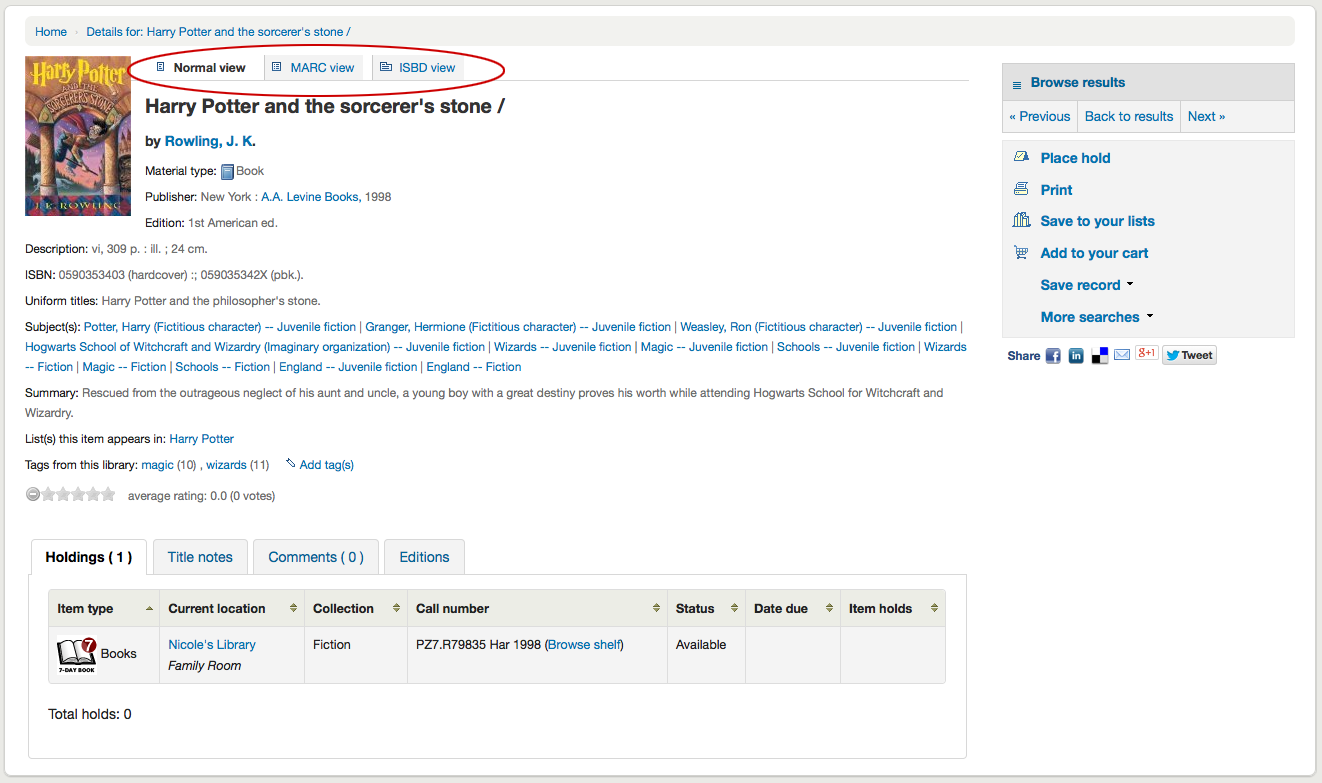
Sie können die Ansicht des Titelsatzes ändern, und anstelle der ‚Normal‘-Ansicht die MARC- oder ISBD-Anzeige oberhalb des Titelsatzes auswählen
Lists and the cart
Ein Korb ist ein temporärer Ablageort für Titel / Exemplare, an denen Sie interessiert sind, dieser bleibt nur während der aktuell geöffneten Session aktiv. Das bedeutet, wenn Sie sich aus dem OPAC ausloggen oder den Browser schließen, werden auch die Exemplare aus dem Korb entfernt. Listen sind daher besser geeignet um Exemplare dauerhaft zu merken. Mehr Informationen zu Listen finden Sie in dem Kapitel Listen im Dienstclient dieses Handbuchs.
Listen
Benutzer können Ihre eigenen privaten Listen verwalten indem Sie den Bereich ‚Ihre Listen‘ öffnen.
Listen erstellen
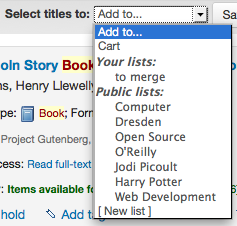
Neue Listen können auch erstellt werden indem Sie im Auswahlmenü ‚Hinzufügen zu …‘ der Trefferliste ‚Neue Liste‘ auswählen
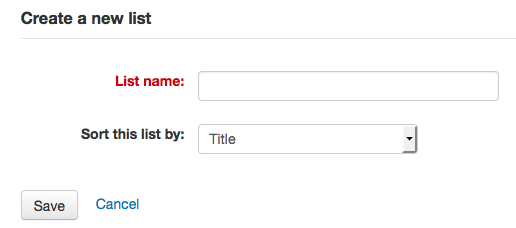
Der Benutzer muss dann nur das folgende Formular ausfüllen
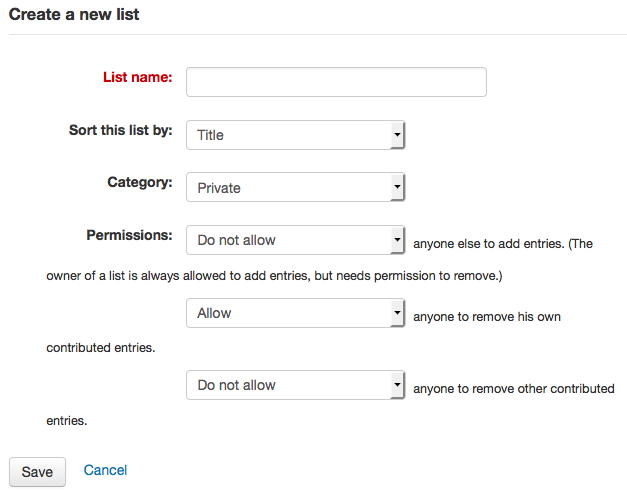
Das einzige Pflichtfeld ist das Feld ‚Listenname:‘. Der Benutzer kann auch auswählen wie die Liste sortiert, und ob sie privat oder öffentlich sein soll.
Eine private Liste kann nur von Ihnen eingesehen und bearbeitet werden (abhängig von den Einstellungen)
Eine öffentliche Liste ist für alle Benutzer sichtbar, aber nur von Ihnen editierbar (abhängig von den Einstellungen)
Wichtig
Wenn Sie es Benutzer über den Systemparameter OpacAllowPublicListCreation nicht erlauben öffentliche Listen anzulegen, können diese nur private Listen anlegen.
Entscheiden Sie wie die Berechtigungen für die Liste aussehen sollen. Sie können Änderungen erlauben für:
alle die diese Liste anzeigen können
jedem die eigenen Einträge zu entfernen
Hinweis
Der Besitzer einer Liste kann immer Einträge hinzufügen, aber benötigt die Bereichtigung um Einträge zu entfernen.
jedem andere Einträge zu entfernen
Titel zu Listen hinzufügen
Titel können ausgehend von der Trefferliste und/oder vom Titelsatz zu einer Liste hinzugefügt werden. Möglichkeiten zum Hinzufügen von Titeln zu einer Liste erscheinen in der Trefferliste am Ende eines jeden einzelnen Titels, sowie ganz oben zu Beginn der Trefferliste
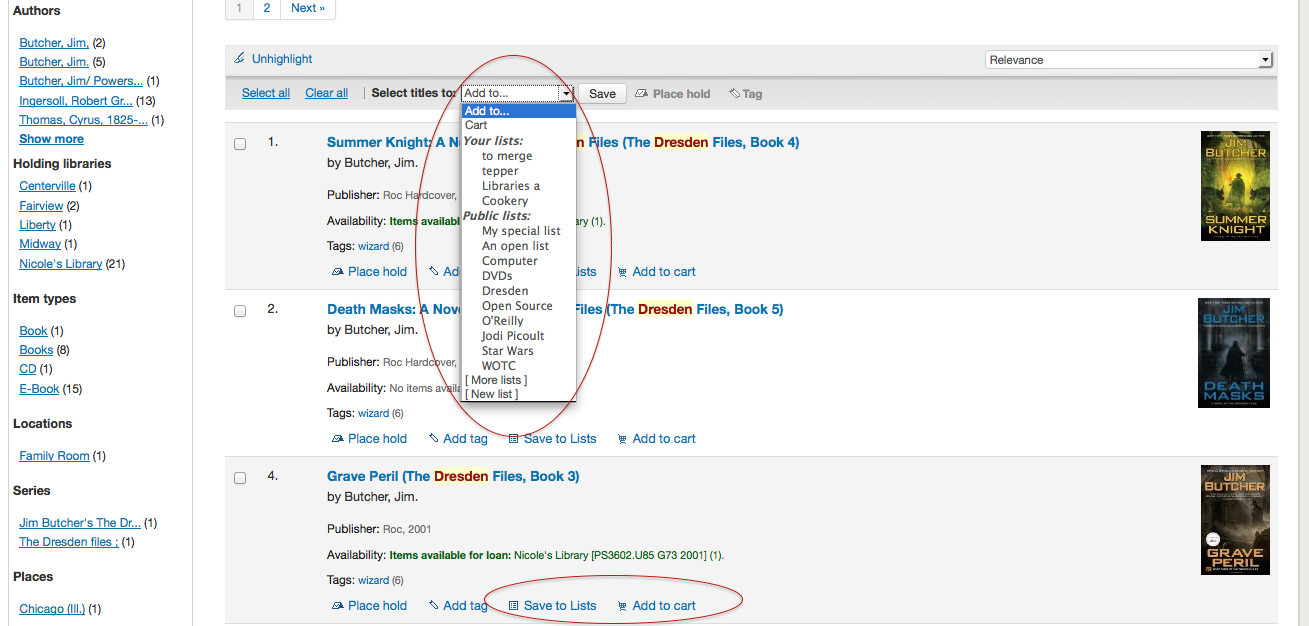
Wählen Sie die Option ‚In Listen speichern‘ wenn Sie einen einzelnen Titel zu einer Liste hinzufügen möchten. Wählen Sie anschließend die Liste, zu der Sie den Titel hinzufügen möchten. Um mehrere Titel zu einer Liste hinzuzufügen, verwenden Sie die Checkboxen auf der linken Seite bei den Titeln die Sie hinzufügen möchten und setzen dort Häkchen, wählen dann die Option ‚Hinzufügen zu…‘ oberhalb der Trefferliste, und wählen schließlich die Liste aus.
Listeninhalte anzeigen
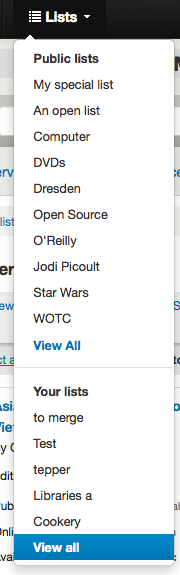
To view the contents of a list, click on the list name under the ‚Lists‘ button.
The contents of the list will look similar to your search results pages except that there will be different menu options across the top of the list.
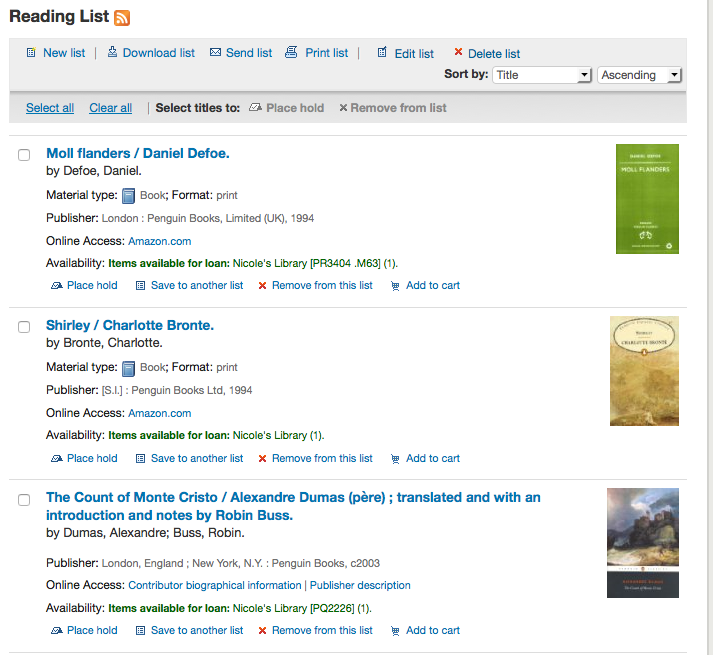
To the right of the list title there is an RSS icon that will allow you to subscribe to updates to the list.
Using the menu options above the list you can place multiple items on hold, download the list contents, email the list or print the list out.
To place a hold on one or more list items check the box to the left of the item and click the ‚Place hold‘ link at the top
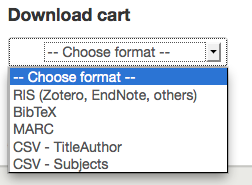
To download the list contents click the ‚Download list‘ link and choose the format you’d like to download the list in
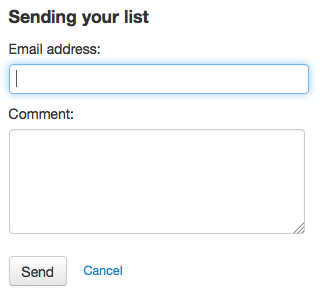
To email the list contents to someone, click the ‚Send list‘ link and enter in your email details in the form that pops up
To print the contents of your list out click the ‚Print list‘ link
Managing lists
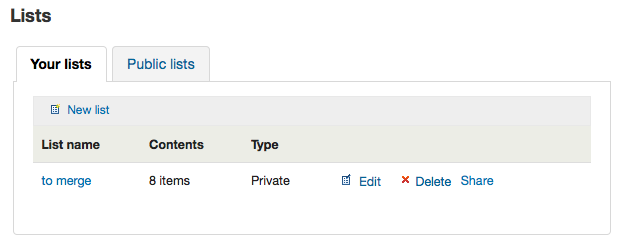
Once the list is saved patrons can begin adding items to it. From the ‚your lists‘ tab on the patron record the patron can edit and delete the lists they have created by clicking the appropriate link to the right of the list name.
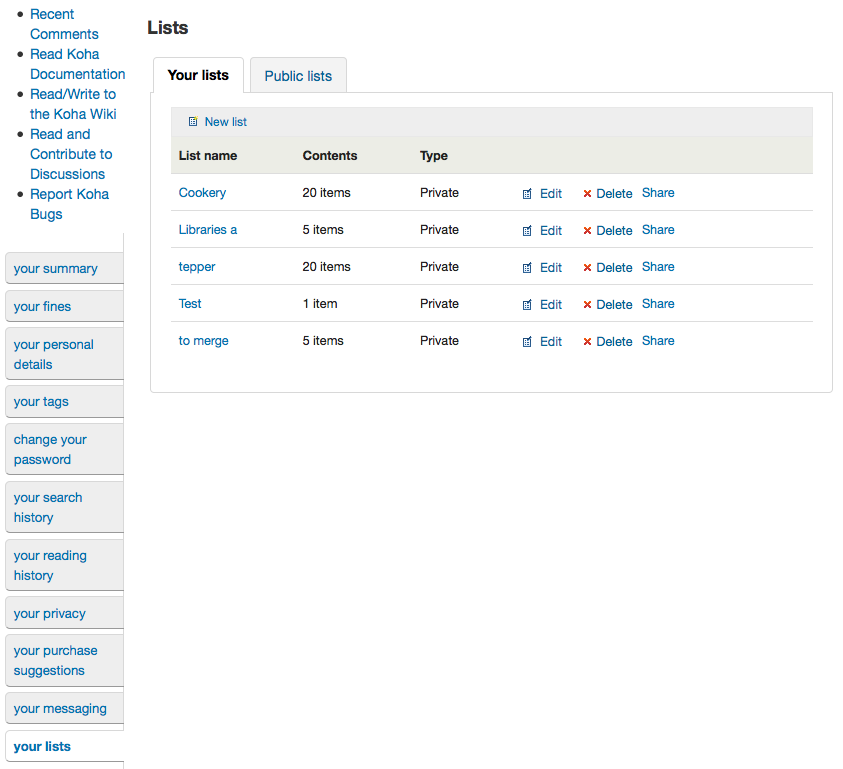
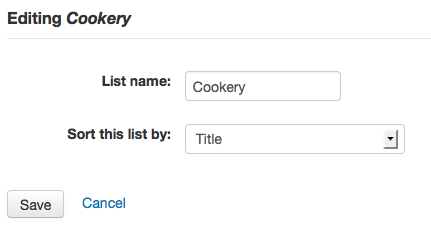
To edit the list’s title or sorting patrons click the ‚Edit‘ link to the right of the list description.
When clicking ‚Delete‘ next to a list you will be asked to confirm that you want to delete the list.
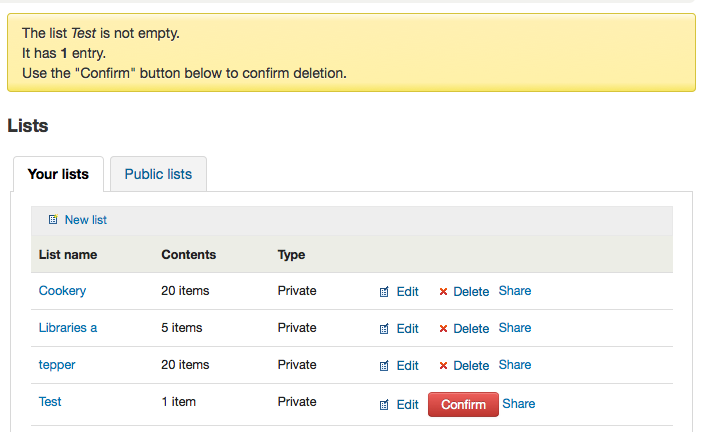
The list will not be deleted until the ‚Confirm‘ button is clicked to the right of the list you’d like to delete.
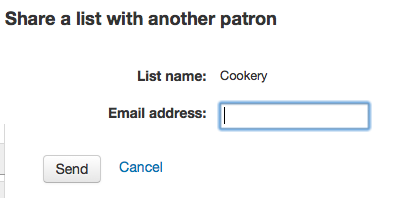
If the library is allowing you to share private lists with the OpacAllowSharingPrivateLists preference then you will see the ‚Share‘ link on your list of lists and the ‚Share list‘ link at the top of each individual list. Clicking this will ask you to enter the email address of a patron.
Once the email address is entered Koha will present you with a confirmation message
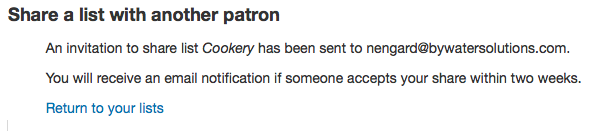
and will send a message to that patron.
Korb
Adding titles to the cart
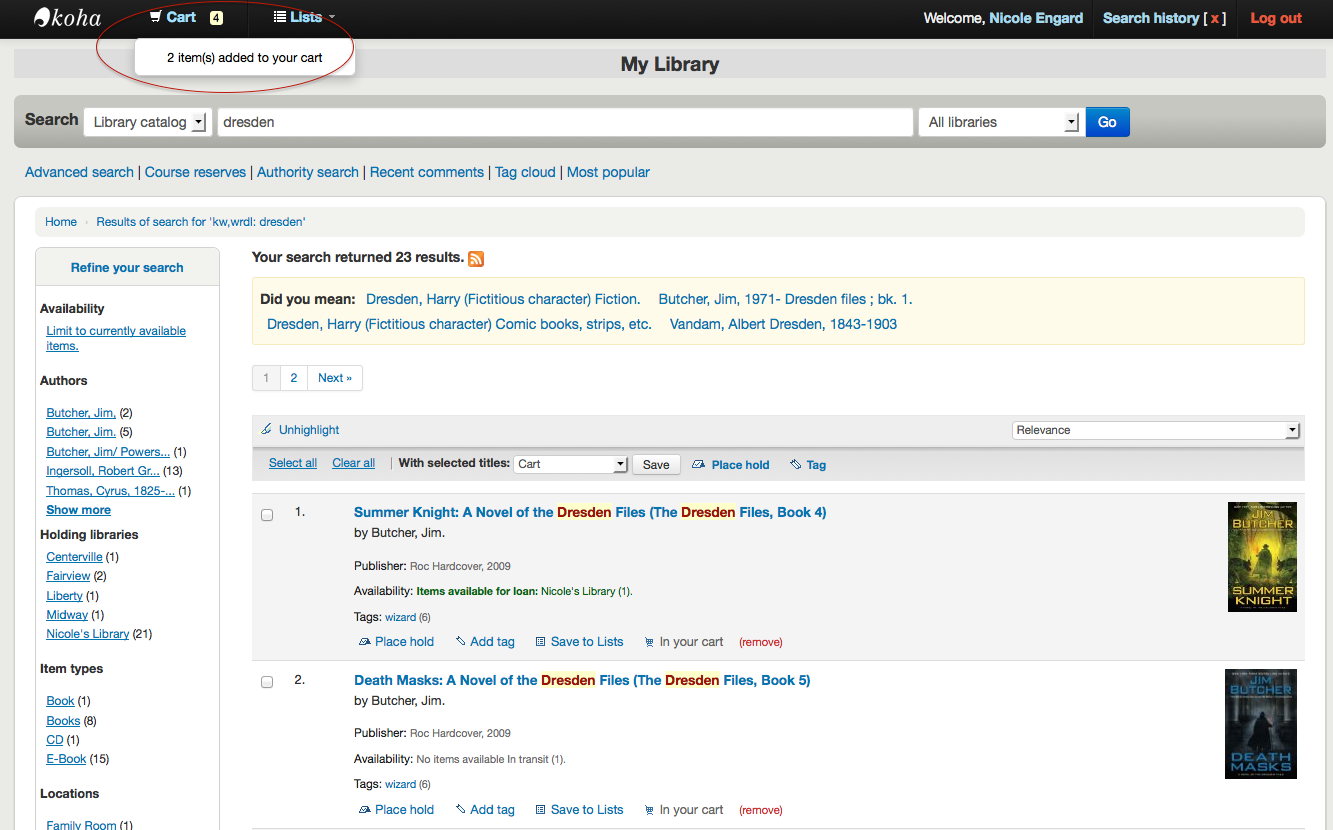
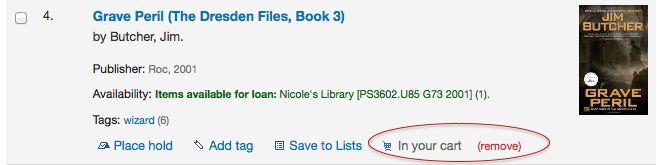
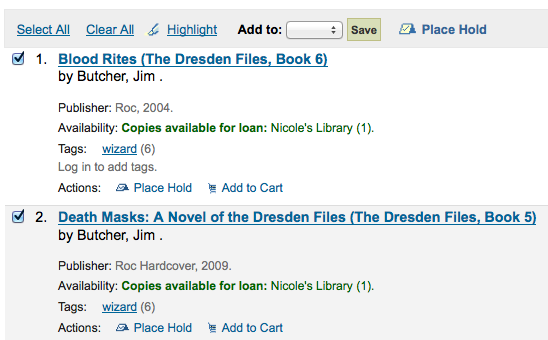
Titles can be added to the cart from the search results and/or from the bibliographic record. On the search results options to add items to the cart appear below each result and across the top of the results page
Clicking the ‚Add to cart‘ button will add the one title to your cart. To add multiple titles at once, check the box to the left of each result and then choose ‚Cart‘ from the ‚Add to‘ pull down at the top of the screen. Once titles are added to the cart you will be presented with a confirmation
From the results you will see which items are in your cart and will be able to remove those items by clicking ‚(remove)‘.
Managing the cart
Once you have titles in your cart you can manage the contents by clicking on the ‚Cart‘ button usually found at the top of the screen. Your cart will open in a new window.
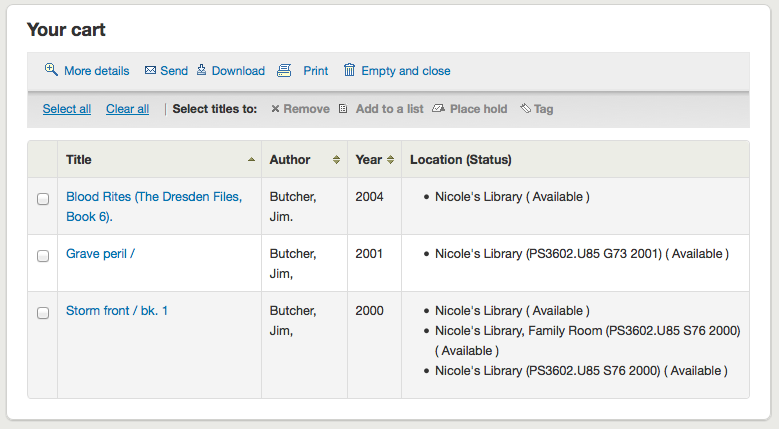
From this window you are presented with several options. Across the top of the cart are several buttons.
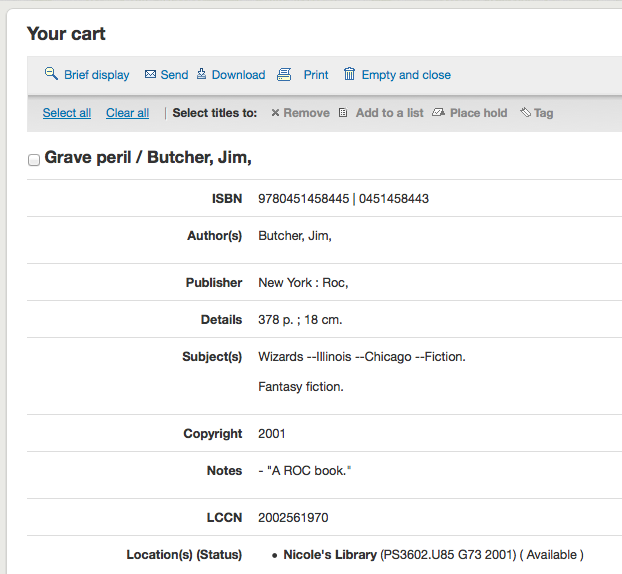
First is the ‚More details‘ button. Clicking this will show you additional information about the titles in your cart (ISBNs, subjects, publisher info, notes and more).
Next is the option to send the contents of your cart to an email address. This is handy if you want to send the resources you found at the library to your home email account to refer to later or to send to a patron researching a specific topic. Clicking this link will open up a new window that asks for the email address and message to send.
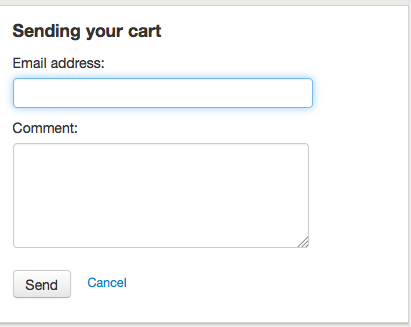
Wichtig
The cart can only be emailed by logged in users. This will prevent your cart email function from being used for spamming.
In addition to sending your cart you can download the contents of your cart in several pre-defined formats or using a CSV profile that you defined in the tools module.
Finally you can print out the contents of your cart by choosing the ‚Print‘ link.
In addition to the various different ways to save the contents of your cart, there are ways to add value to the data in your cart. By selecting one or more titles from the cart you can add them to a list (click ‚Add to a list‘), place hold(s) (click ‚Place hold‘), or tag them (click ‚Tag‘). All of these operations follow the same procedure as they do when performing them in the OPAC.
Placing holds
Patrons can place holds on items via the OPAC if they’re logged in and you have the RequestOnOpac preference set to ‚Allow‘. If the item can be placed on hold the option to place it on hold will appear in several different places.
When viewing a list or search results page you’ll see the option to place hold on multiple items by checking the boxes to the left of the results and clicking ‚Place hold‘ at the top
When viewing a list or search results page you’ll see the option to place the item on hold below the basic information about the title
When viewing an individual title you’ll see the option to place a hold in the box on the right side of the screen
No matter which of the above links you click to place your hold you’ll be brought to the same hold screen.
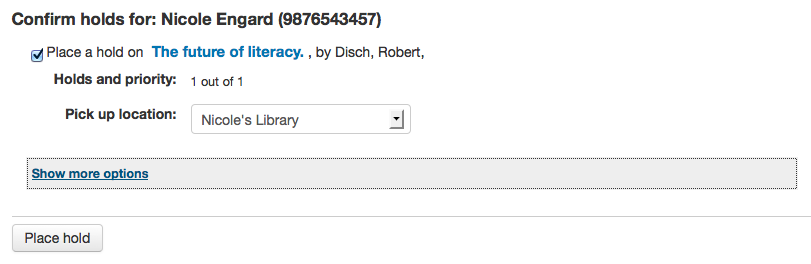
Check the box to the left of the items you’d like to place on hold
The title includes a link back to the detail page for the record
The priority shows where in the holds queue this hold will fall
If allowed by your OPACAllowUserToChooseBranch preference the patron can choose where they’d like to pick up their hold. The list of available pickup locations will include all libraries that have ‚Pickup location‘ set to ‚Yes‘ on the library configuration page.
If you would like to see more options you can click ‚Show more options‘
Place hold form with more options
If you have the AllowHoldItemTypeSelection preference set to ‚Allow‘ and the record had more than one item type attached you will see an option to choose to limit the hold to a specific item type

If allowed by your OPACAllowHoldDateInFuture preference, the ‚Hold starts on date‘ column will show. This field allows the patron to have their hold start on a future date.
By default holds placed in the system remain until canceled, but if the patron fills in a ‚Hold not needed after‘ date then the hold has an expiration date.
Wichtig
Expired holds are removed by the expired holds cron job, this is not an automatic process and must be set up by your system administrator
If allowed by the OpacHoldNotes preference then patrons can leave notes about their holds for the library by clicking the ‚Edit notes‘ button
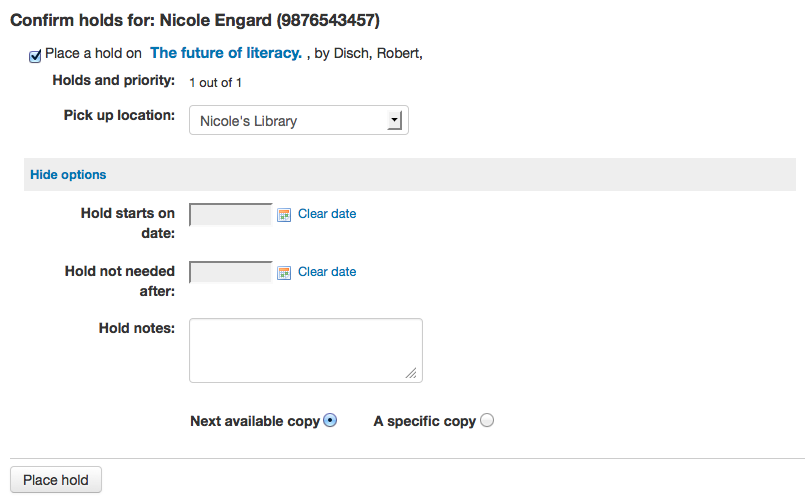
Depending on the rules you set regarding item specific holds in your circulation and fines rules the patron will be allowed to choose whether to place the hold on the next available copy and/or a specific copy.
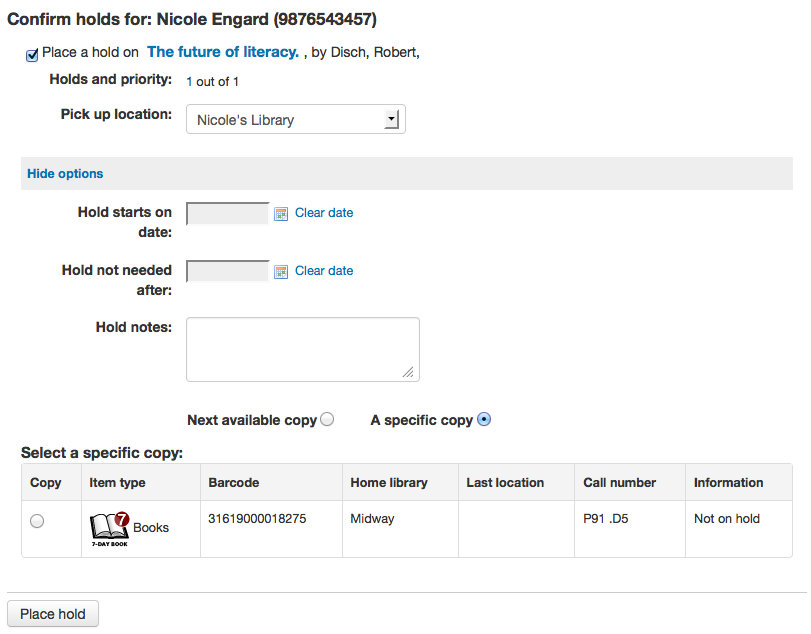
After clicking the ‚Place hold‘ button the patron will be brought to their account page where they’ll see all of the items they have on hold.
Enhanced content
Tagging
Depending on your settings for the TagsEnabled, TagsInputOnList and TagsInputOnDetail preferences you may be able to add tags to bibliographic records from the search results and/or bibliographic records. If you are allowing patrons to add tags from the search results screen you will see an input box below each result and a ‚Tag‘ option at the top of the screen.

To add a tag to one item, type the tabs (separated by commas) in the ‚New tag‘ box and click ‚Add‘. You will be presented with a confirmation of your tags being added.

From the results you can also tag items in bulk by clicking the checkboxes on the left and then clicking the ‚Tag‘ button at the top. After clicking the button it will change into an input box for you to add tags to all of the items you have selected.

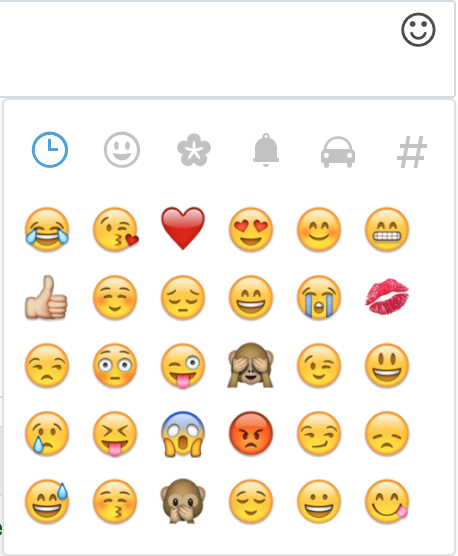
Emojis can also be included using the emoji picker when adding tags
Kommentare
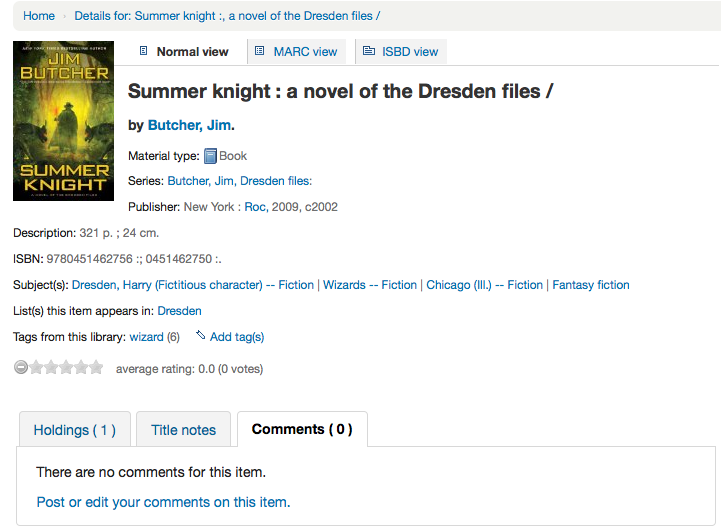
Patrons can leave comments in the OPAC if you have the reviewson preference set to allow this. Each bibliographic record has a comments tab below the bibliographic information.
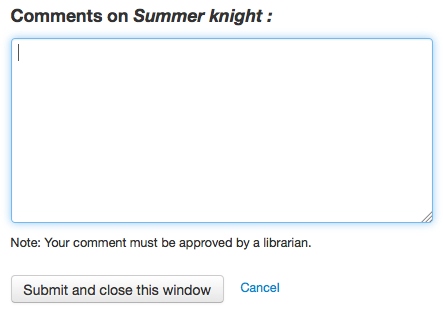
If the patron is logged in they will see a link to add a comment to the item. Clicking this link will open a pop up window with a box for their comments.
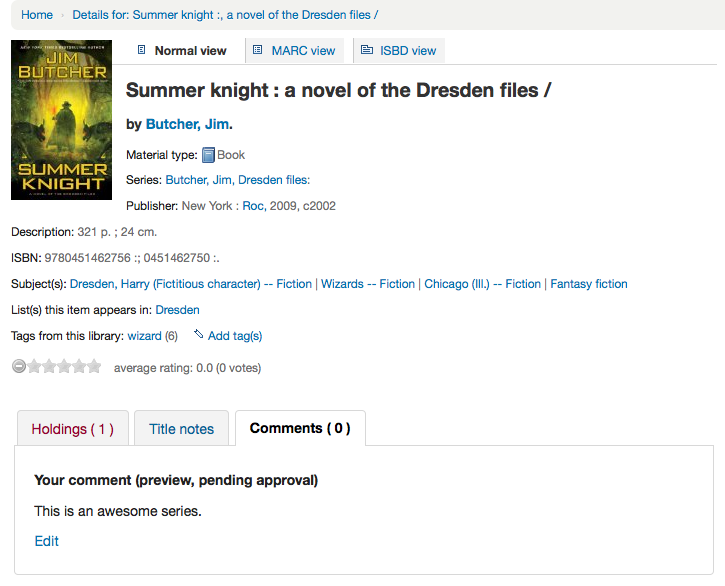
Once the comment has been typed and the ‚Submit‘ button clicked, the patron will see their comment as pending and other patrons will simply see that there are no comments on the item.
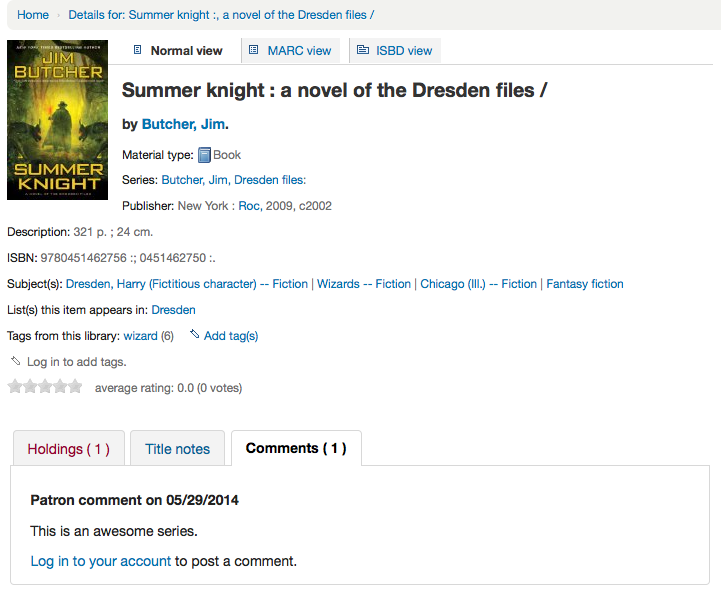
Once the comment is approved the patron will see the number of comments on the ‚Comments‘ tab and their comment labeled amongst the other comments. If you have set your ShowReviewerPhoto preference to ‚Show‘ then you’ll see the patron’s photo pulled from the Libravatar library.

Other patrons will see the comment with the name of the patron who left the comment (unless you have set the ShowReviewer preference to not show patron names).
If you have your OpacShowRecentComments set to show then you’ll see the approved comments on that page.
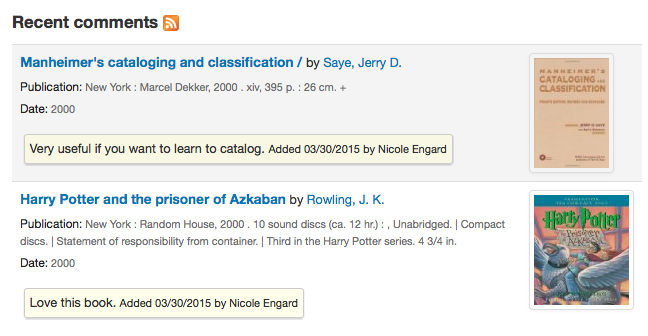
From this page patrons can subscribe to the recent comments using RSS if they would like.
Zotero
Zotero is a Firefox add on that allows for the saving and generating of a bibliography. Learn more about and download Zotero at http://zotero.org.
When on the search results in the Koha OPAC, if you have Zotero installed, you will see a folder icon in the address bar to the right of the URL. Clicking that folder will open up a list of titles on the page for you to pick from to add to Zotero.
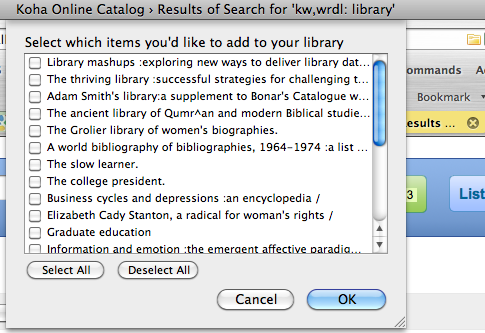
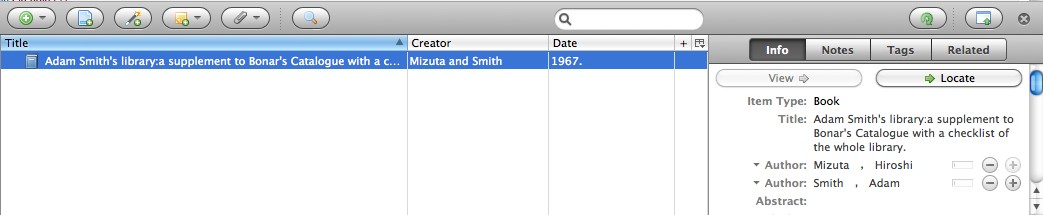
Select the titles you want to add to Zotero and then click the ‚OK‘ button. This will add the title to Zotero. You can see the title by opening your Zotero library.
Custom RSS feeds
Using the RSS feeds cron job you can generate an RSS feed for any SQL query (for example a new acquisitions RSS feed). The cron job is run on the command line to produce an RSS XML document.
The output should be placed in a directory accessible to the OPAC (or staff) web interface so that users can download the RSS feed.
An example of usage can be found at: misc/cronjobs/rss.pl lastAcquired.conf
Normally the RSS cron job should be run periodically (e.g., daily) to keep the feed up-to-date.
The configuration file (e.g., lastAcquired.conf) lists
name of the template file to use
path of output file
SQL query
The RSS cron job runs the SQL query, then feeds the output of the query through the template to produce the output file.
Wichtig
To use custom RSS feeds you need to turn on the RSS cron job.
OPAC self registration
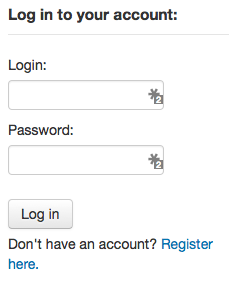
If you allow it, patrons can register for their own accounts via the OPAC. If you have the PatronSelfRegistration preference set to ‚Allow‘ then patrons will see a link to register below the log in box on the right of the main OPAC page.
When the patron clicks the ‚Register here‘ link they will be brough to a registration page. The options on the registration page can be conrolled by editing the PatronSelfRegistrationBorrowerMandatoryField and the PatronSelfRegistrationBorrowerUnwantedField preferences.
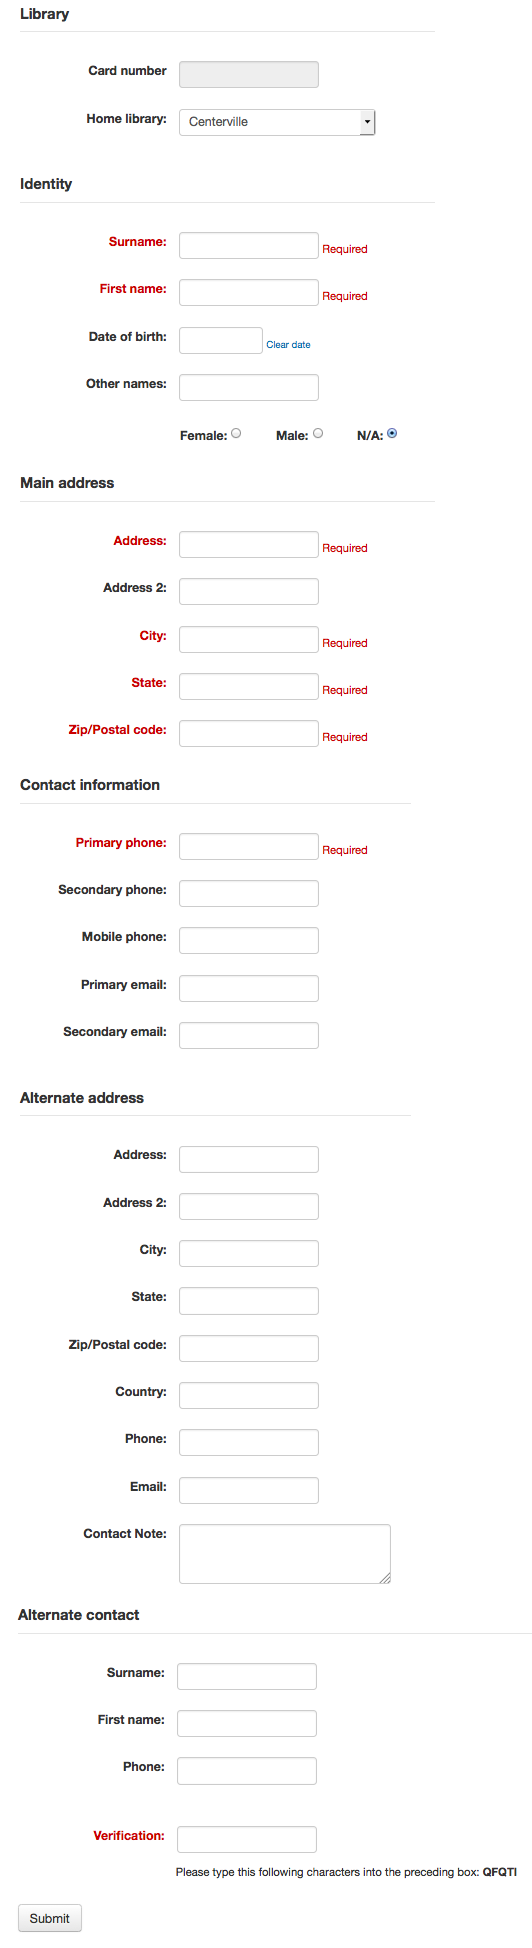
Once the patron has confirmed submitted their registration they will either be sent an email to confirm their account (if you have the PatronSelfRegistrationVerifyByEmail preference to require this) or presented with their new username and password.

Patrons registered in this way will not have a cardnumber until assigned one by the library, but will have access to all OPAC functionality immediately. For this reason it is recommended that you:
set up a provisional patron category for self registered patrons (such as ‚Self Registered) instead of using an existing patron category and set that value in the PatronSelfRegistrationDefaultCategory preference
give this patron category minimal circulation privileges in the Circulation and fines rules (such as allowing a couple holds, but no check outs)
That way patrons will either have to come in to the library to verify their identity before given a cardnumber and the ability to check items out or the library will have to come up with internal policy on generating cardnumbers before providing them to self registered patrons. Once this is done the library can change the category to one that is more appropriate (be it an adult, resident, non resident, student, etc) and add a cardnumber/barcode.
Your account
From the OPAC patrons can log in and access their account if you have set the opacuserlogin preference to ‚Allow‘. Once logged in patrons are brought to their account summary. If you would like to get to your account in the OPAC, you can click on your name in the top right of any page in the OPAC.
Resetting your password
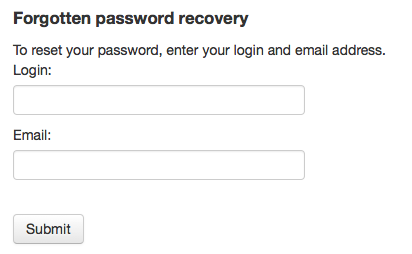
If you have the OpacResetPassword set to allow patrons to reset their password they can click ‚Forgot your password?‘ link found under the log in box to reset their passwords.

Once clicked they will be presented with a form asking for their username and their email address (patrons must have an email address on file to reset their password).
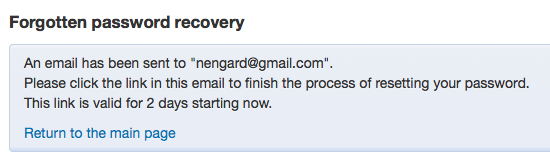
The system will then email the patron instructions for resetting their password.
Your summary
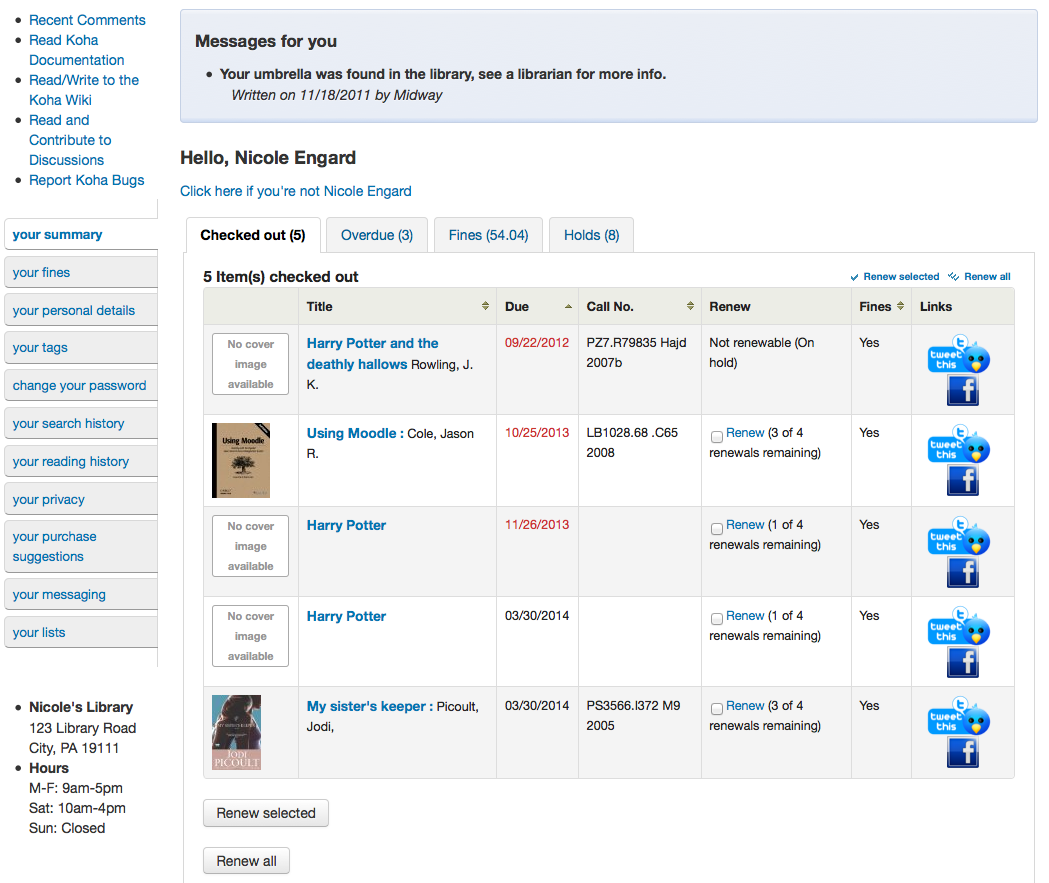
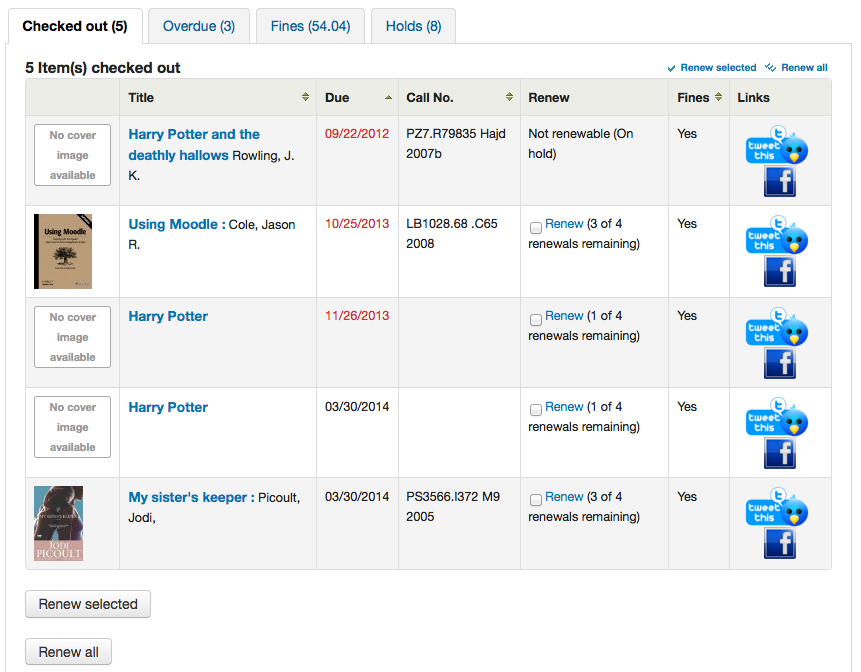
From the ‚your summary‘ tab, patrons will see all of the items they have checked out with the overdue items highlighted in red. If you have OpacRenewalAllowed set to ‚Allow‘ then your patrons will be able to renew their books right from the OPAC. If you have HTML entered in the OPACMySummaryHTML preference then you will see that to the right of the ‚Fines‘ column.
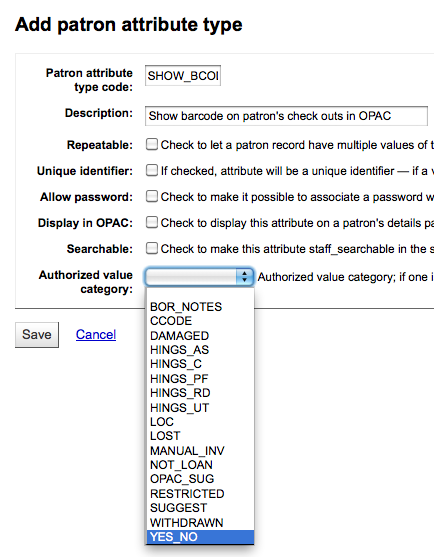
If your patrons would like to see the items barcodes on their list of checked out items you can set up a patron attribute with the value of SHOW_BCODE and authorized value of YES_NO.
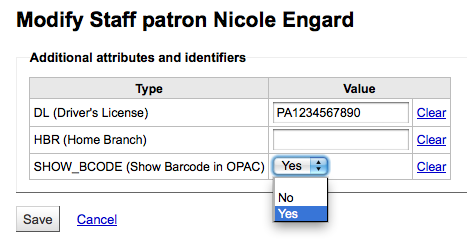
Then on the patron’s record set the value for SHOW_BCODE to yes.
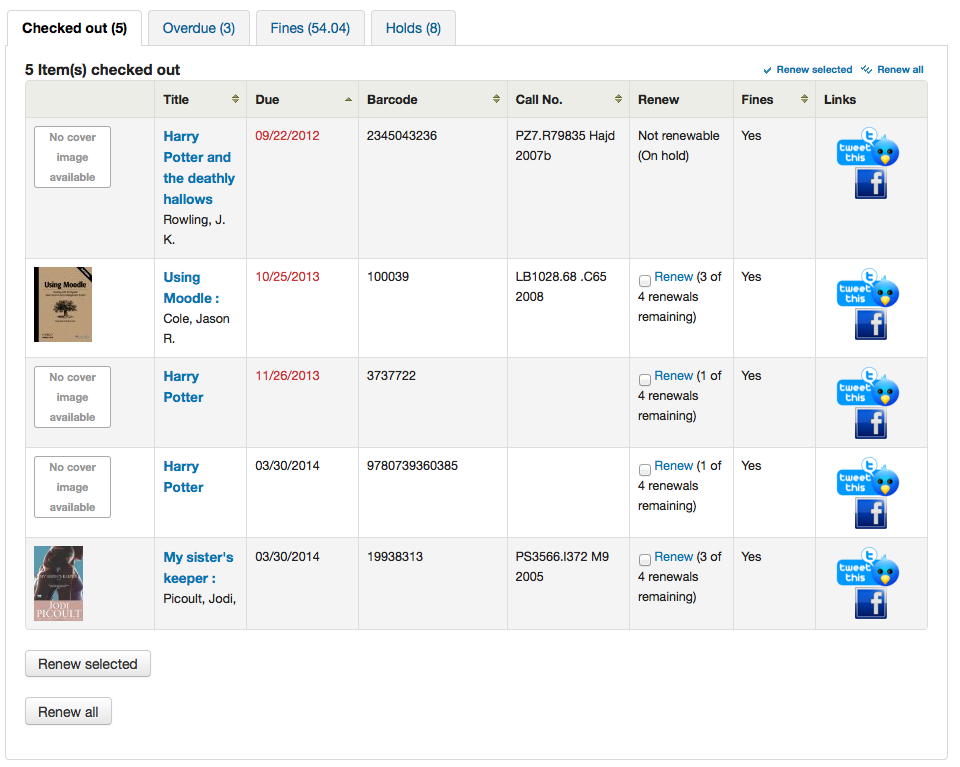
This will add a column to the check out summary in the OPAC that shows the patrons the barcodes of the items they have checked out.
If you would like your patrons to leave a note on an item they have checked out AllowCheckoutNotes preference must be set to allow.
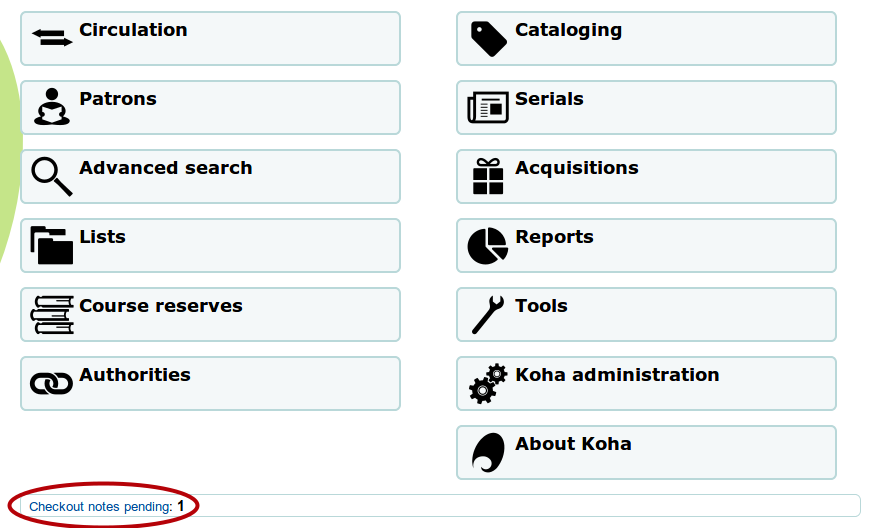
In the patron’s summary of checkouts, there will be an added column to allow the patron to leave a note (for example: missing first page, or DVD is scratched). This note once confirmed by the patron will appear to the staff at the bottom of the staff interface’s home page, and also when the item is checked in.
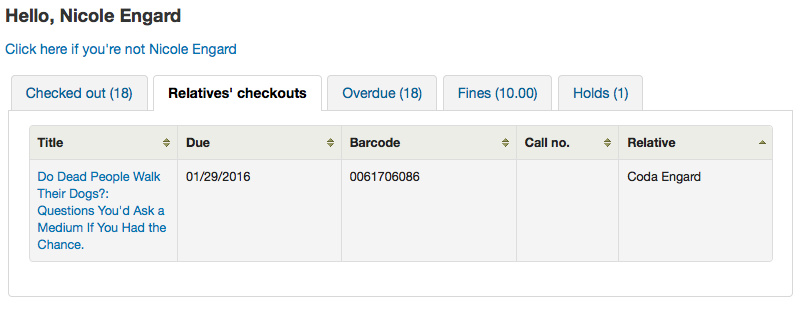
If their guarantee has allowed it via their privacy, when the guarantor logs in they will see a tab labeled „Relatives‘ checkouts“ on their summary tab.
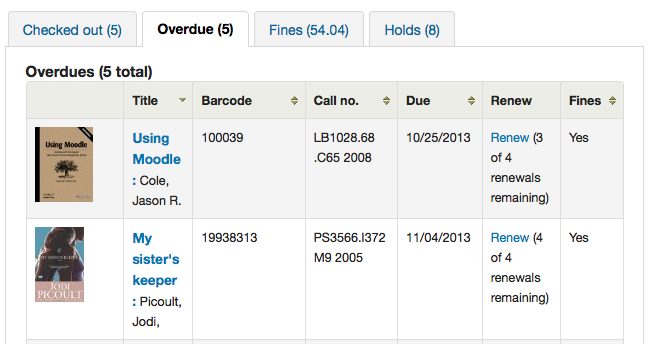
Clicking on the ‚Overdue‘ tab will show only the items that are overdue.
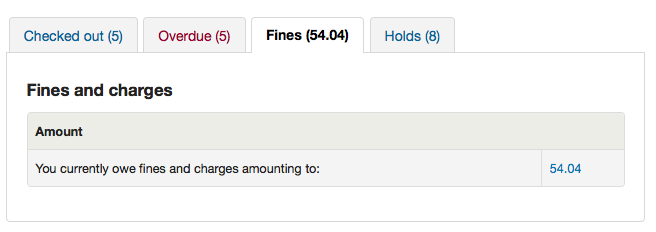
The ‚Fines‘ tab will show just a total of what the patron owes. Clicking on the total will take them to the ‚your fines‘ tab where they will see a complete breakdown of their fines and bills. If you don’t charge fines at your library you can turn the display of these tabs off by setting the OPACFinesTab preference to ‚Don’t allow.‘
Finally, clicking on the ‚Holds‘ tab will show the patron the status of all of the items they have on hold.
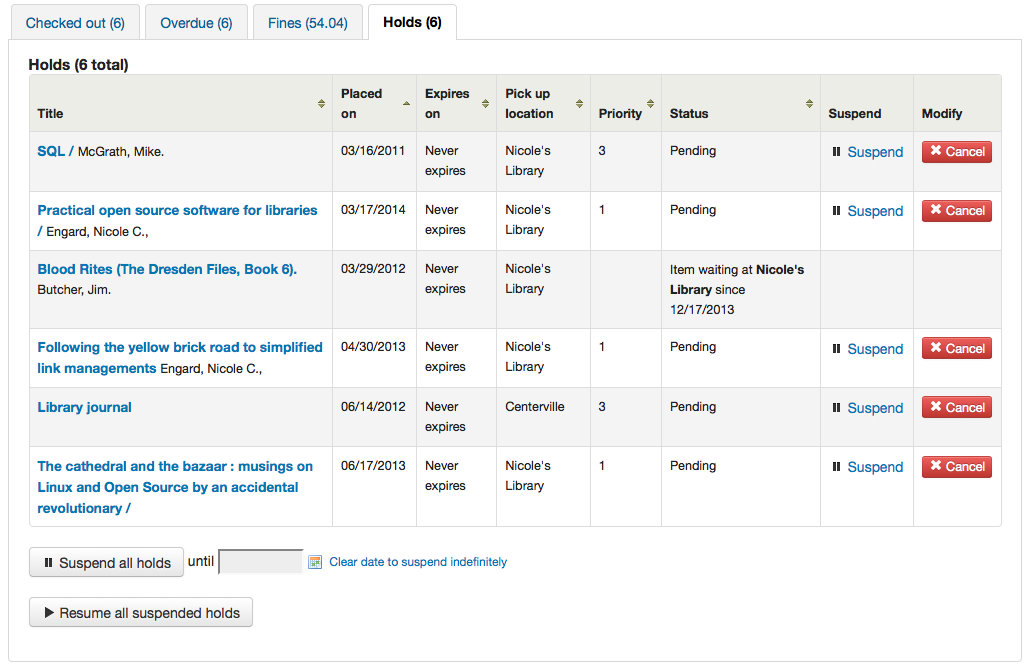
Patrons can cancel or suspend (depending on the value of your SuspendHoldsOpac system preference) their own holds if they are not in transit or already waiting for them. When they click ‚Suspend‘ they will be presented with the option to choose a date for their hold to resume.

They can also suspend all of their holds indefinitely or until a specific date if they choose by filling in the suspend options at the bottom of the page.
Hinweis
If you have your Ausgesetzte Vormerkungen reaktivieren preference set to „Don’t allow“ then you will not have the option to put an end date on the hold suspension
Patron flags
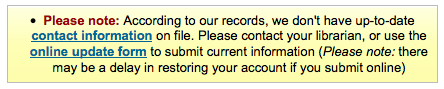
If you have flagged your patron’s account they may see one of the following error messages at the top of their account.
Card marked as lost

Patron address in question
Hinweis
this error message will not include a link to the update form if you have OPACPatronDetails set to ‚Don’t allow‘
Patron marked restricted

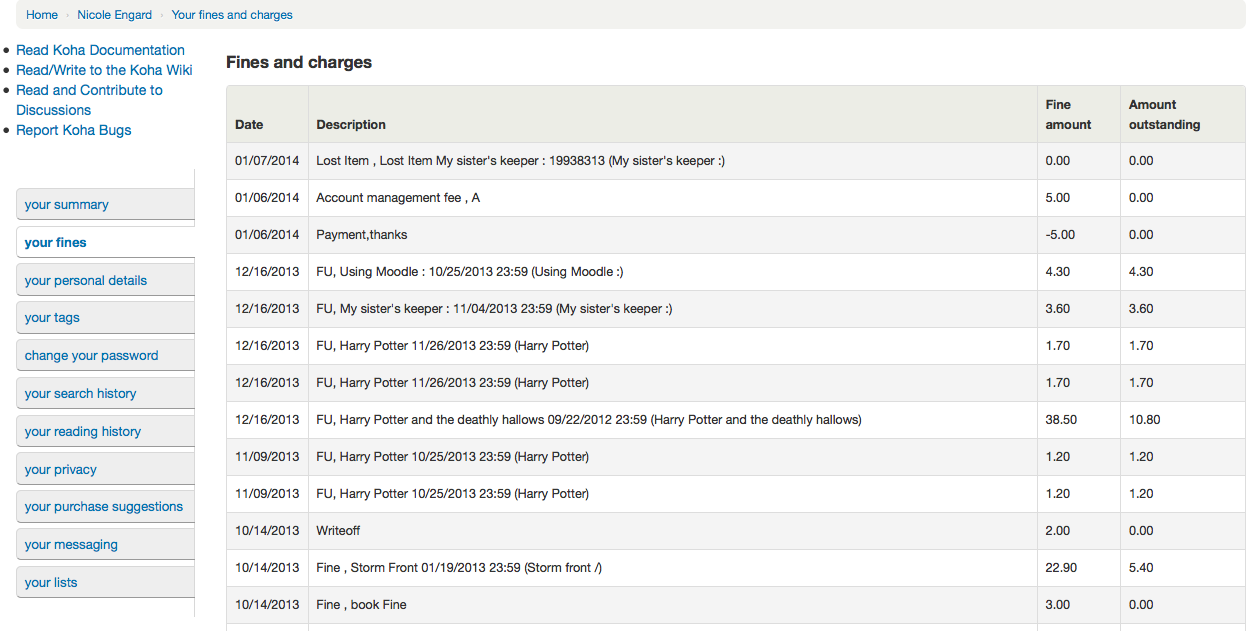
Your fines
If your library charges fines the next tab on the left is ‚your fines‘. Opening this tab will show the patron an entire history of their accounting at the library.
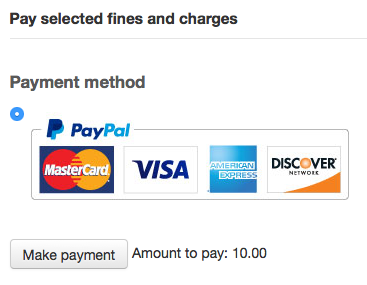
If you are allowing patrons to pay their fines using PayPal with the EnablePayPalOpacPayments preference there will be checkboxes to the left of each fine with an outstanding amount.
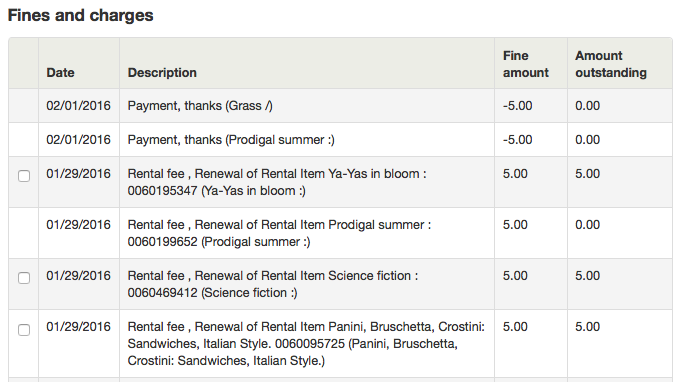
At the bottom the patron will see the option to pay with PayPal for the items they have checked.
After paying they will be presented with a confirmation

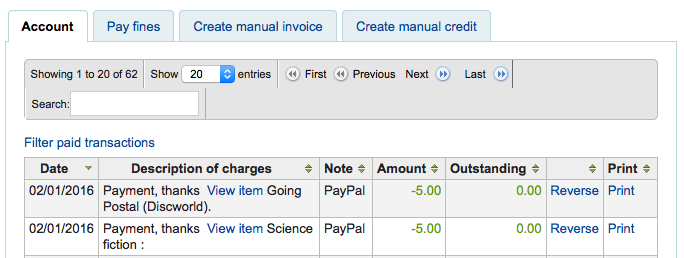
And you will see that the fine was paid using PayPal on the staff side.
Your personal details
If you have your OPACPatronDetails preference set to ‚Allow‘, your patrons will see a form filled in with their contacting information by clicking on the ‚Your personal details‘ tab. You can control what fields patrons see and can modify via the OPAC by setting the PatronSelfRegistrationBorrowerMandatoryField PatronSelfRegistrationBorrowerUnwantedField preferences.
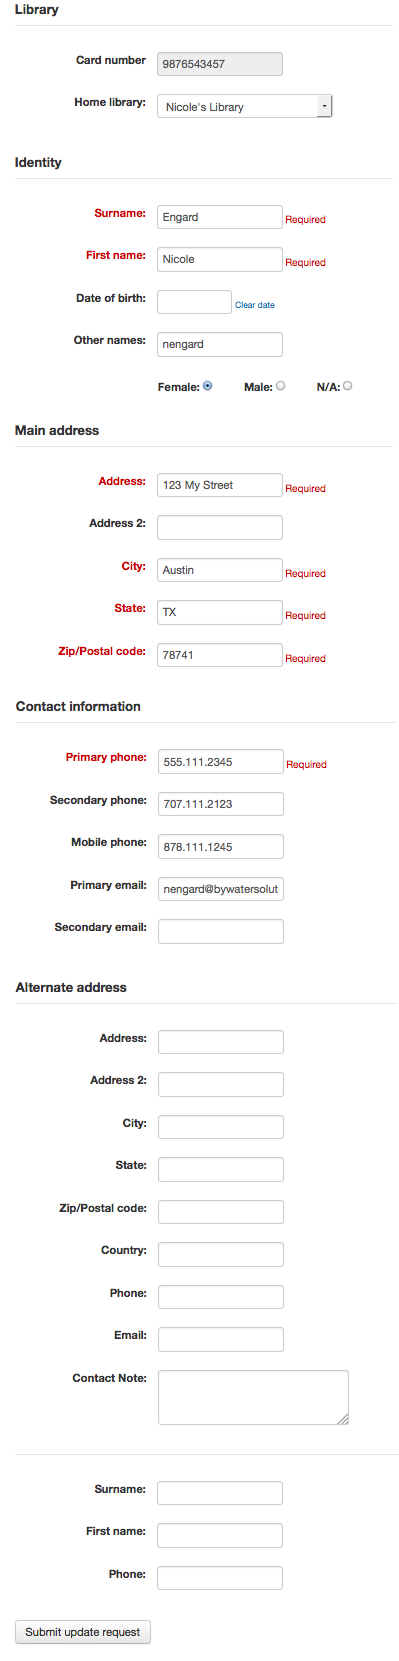
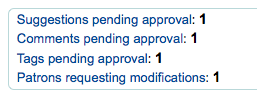
Patrons can edit their details in this form and click ‚Submit changes‘ to have their edits sent to the library for review before their record is updated. Staff will see all patrons requesting modification to their record listed below the modules on the main dashboard along with anything else awaiting library attention.
If the OPACPatronDetails preference is set to ‚Don’t allow‘ then patrons will simply see their details and a message stating that they should contact the library for changes.

Your tags
If your library has TagsEnabled set to ‚Allowed‘ then the next tab on the left will be ‚your tags‘. This tab will show patrons all of the tags in the system as a cloud and then all of the tags they have applied in a list format. From here patrons have the ability to remove tags that they have added if they want.

Change your password
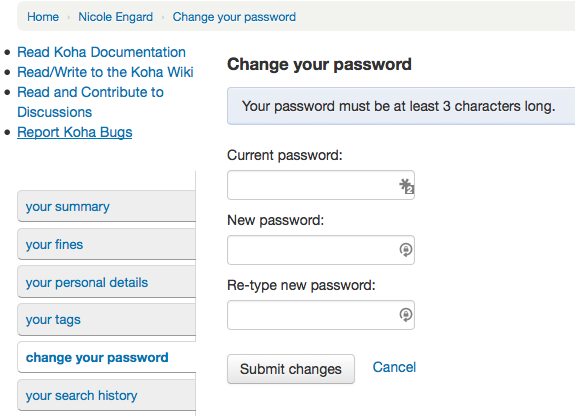
Next, if you have OpacPasswordChange set to ‚Allow‘ the next tab will be ‚change your password,‘ where patrons can change their password for logging into the OPAC. Patrons will be presented with a standard form asking them to enter their old password and then their new password twice.
Your search history
If you have your EnableOpacSearchHistory preference set to ‚Allow‘ then your patrons can access their search history via the ‚your search history‘ tab.
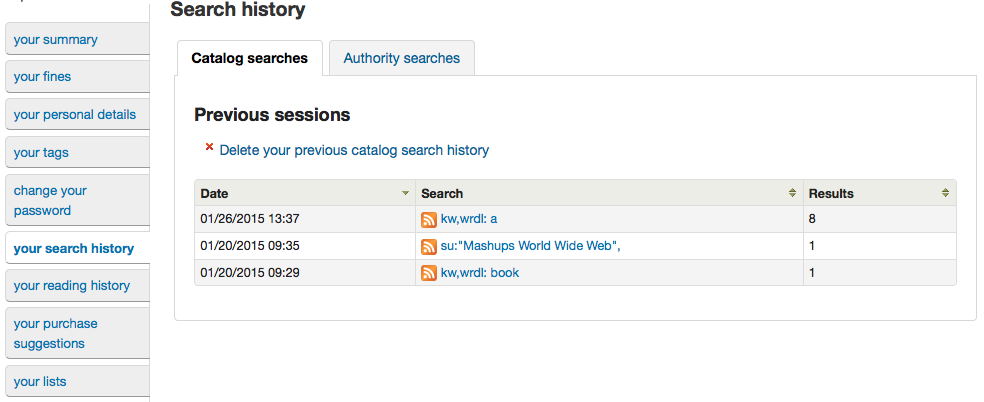
The search history is a record of all searches run by the patron. Clicking on any of the search phrases will re-run the search for the patron. The search history can be deleted by the patron at any time by clicking the ‚Delete your search history‘ link found at the top of this tab or by clicking the little red ‚x‘ next to the ‚Search history‘ link at the top right of the OPAC.

Your reading history
Depending on your library’s setting for opacreadinghistory your patrons may see the ‚your reading history‘ tab next. This will show the patron their entire reading history unless they have asked the library to not keep that information via the ‚your privacy‘ tab which will appear if you have the OPACPrivacy preference set to ‚Allow.‘

If you have HTML entered in the OPACMySummaryHTML preference then you will see that to the right of the ‚Date‘ column.
Your privacy
The ‚your privacy‘ tab will appear if you have both the opacreadinghistory and the OPACPrivacy preferences set to ‚Allow.‘ This tab will allow the patrons to decide how the library keeps their circulation history data.
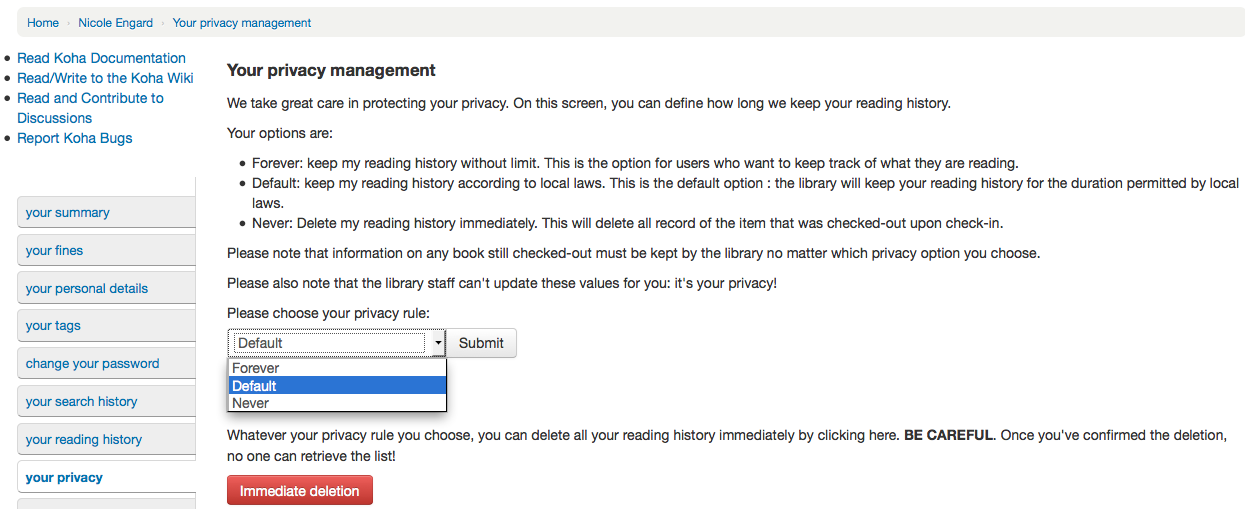
The patron can choose from three options:
Für immer: Meine Lesehistorie wird ohne Einschränkung gespeichert. Dies ist die Option für Benutzer, die den Überblick über das Gelesene bewahren möchten.
Standard: Speichern Sie meine Lesehistorie nach den geltenden Datenschutzbestimmungen. Dies ist die Standardeinstellung: Die Bibliothek wird die Daten so lange speichern, wie die geltenden Datenschutzbestimmungen dies erlauben.
Niemals: Lösche meine Suchhistorie sofort. Mit dieser Option wird die Lesehistorie sofort nach der Rückgabe des Titels gelöscht.
Depending on the patron’s suggestions the contents of the ‚Your reading history‘ tab and the ‚Circulation History‘ tab in the staff client may change.
Regardless of the patron’s choice they can delete their reading history in bulk at any time by clicking the ‚Immediate deletion‘ button.
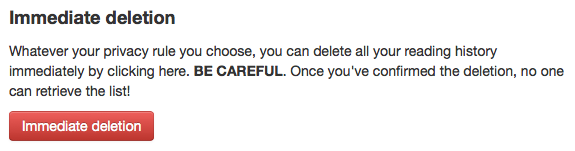
Clicking this button will not delete items that are currently checked out, but will clear the patron’s past reading history.
Wichtig
In order for the patron to be able to delete their reading history you must have the AnonymousPatron preference set.
If you’re allowing guarantees to grand permission to their guarantors to view their current checkouts with the AllowPatronToSetCheckoutsVisibilityForGuarantor preference they will see that option on this screen.

When the guarantor logs in they will see a tab labeled „Relatives‘ checkouts“ on their summary tab.
Your purchase suggestions
If your library allows patrons to make purchase suggestions the next tab will show all suggestions that the patron made to the library and their statuses. To disable this tab and the suggestion functionality set the Anschaffungsvorschlag preference to ‚Don’t allow.‘
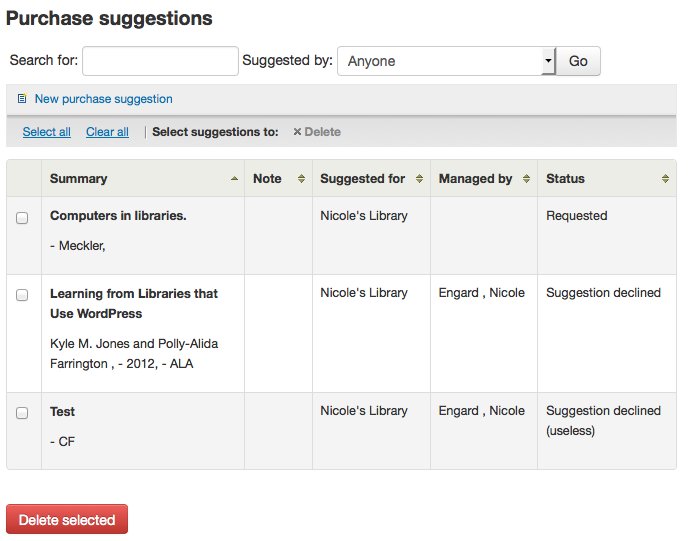
If you have OPACViewOthersSuggestions set to ‚Show‘ then patrons will be able to search suggestions from the top of this list.
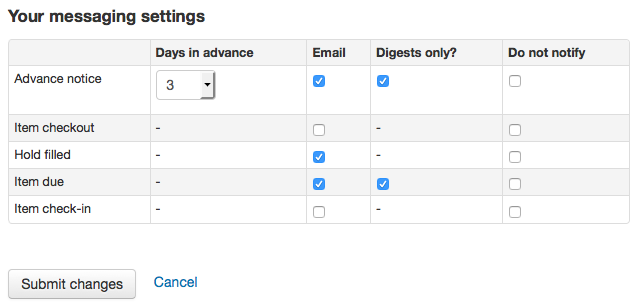
Your messaging
If your library has the EnhancedMessagingPreferences and the EnhancedMessagingPreferencesOPAC preferences set to ‚Allow‘ then your patrons will be able to choose which messages they receive from the library (with the exception of overdue notices which the library controls).
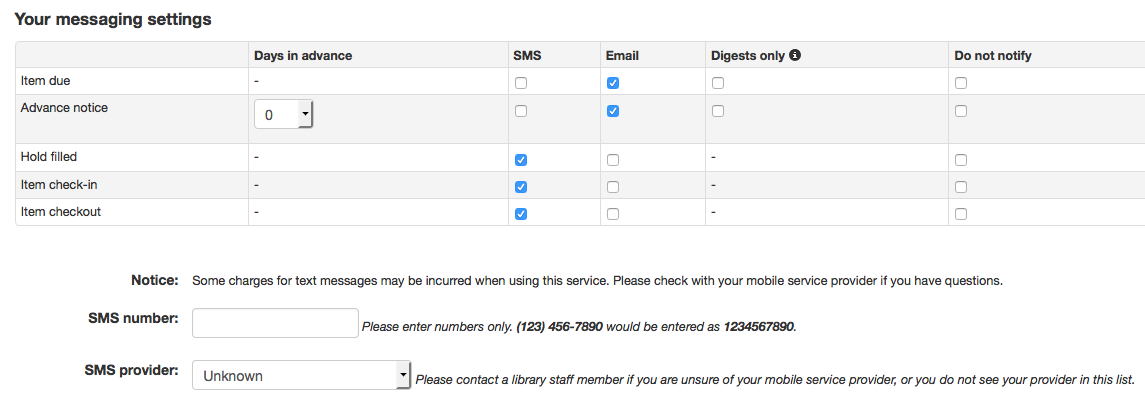
If you use an outside driver for sending text messages set with the SMSSendDriver preference, you will see an additional column to receive these messages as SMS (or text messages) and a field for a cell (or SMS) number.
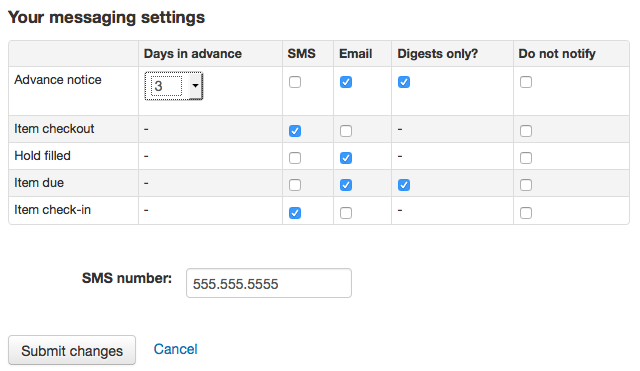
If you are using the Email protocol for sending text messages set with the SMSSendDriver preference, you will see an additional column to receive these messages as SMS (or text messages), a field for a cell (or SMS) number, and a pull down listing cellular providers entered in administration.
If you are using the Itiva Talking Tech service you will see an additional column to receive these messages via Phone.
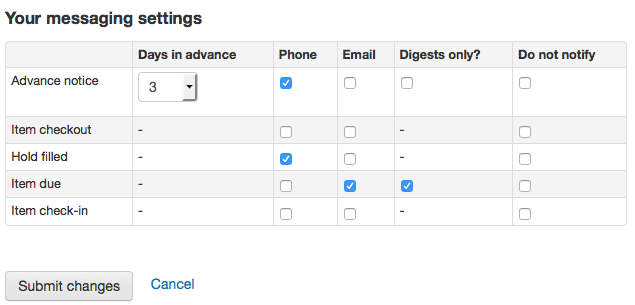
Diese Benachrichtigungen sind:
Advanced notice: A notice in advance of the patron’s items being due (The patron can choose the number of days in advance)
Item checkout: A notice that lists all the of the items the patron has just checked out and/or renewed, this is an electronic form of the checkout receipt
Hold filled: A notice when you have confirmed the hold is waiting for the patron
Item due: A notice on the day and item is due back at the library
Item check-in: A notice that lists all the of the items the patron has just checked in
Nutzer können diese Benachrichtigungen gesammelt erhalten, wenn die Checkbox in der Spalte ‚Sammelmail‘ angehakt, und die Benachrichtigungsart gewählt wird. Bei einer Sammelbenachrichtigung werden alle Benachrichtigungen eines Benachrichtigungstyps in einer Mail zusammengefasst (z. B. alle Exemplare die in drei Tagen fällig werden in einer Mail) anstelle von mehreren Mails für jedes Exemplar.
Wichtig
You must choose a delivery method (SMS or email or phone) along with ‚Digest only?‘ if you would like to receive a digest of the messages.
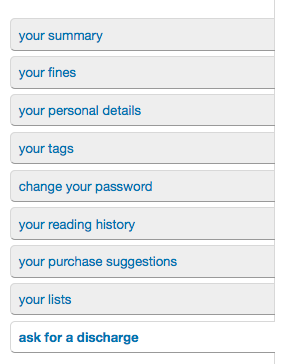
Your lists
If your library has the virtualshelves set to ‚Allow‘ they will see the ‚your lists‘ tab. From here your patrons can review public lists and create or edit their own private lists.
Ask for a discharge
If you have enabled the useDischarge preference then patrons will be able to request a discharge via the OPAC.
From here patrons can request a discharge
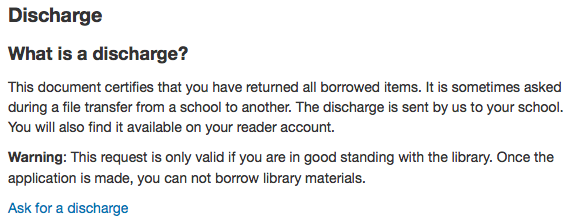
And will receive confirmation of their request.

Your routing lists
If you are named as a recipient on any serial routing lists you will see them listed here. The following note is displayed „You are subscribed to the routing lists for following serial titles. If you wish to make changes, please contact the library“.
Your interlibrary loan requests
If your library has the ILLModule preference set to ‘Enable’ patrons will have the option to make ILL requests when logged in to their OPAC account. From here they can view their existing requests and place new ones.

To place a new interlibrary loan request click on ‘Create a new request’ and choose a request form.

Hinweis
The options displayed are dependent on your ILL configuration. See the ILL backends wiki page at https://wiki.koha-community.org/wiki/ILL_backends further explanation.
Hinweis
If you have entered copyright text in the ILLModuleCopyrightClearance preference the text displays here and you need to click ‘Yes’ to accept before continuing.
Complete the publication details as fully as possible. Depending on the form in use you may see the option to add Custom fields for additional information such as notes. Destination branch is a required field, this is the branch you would like the request to be sent to.
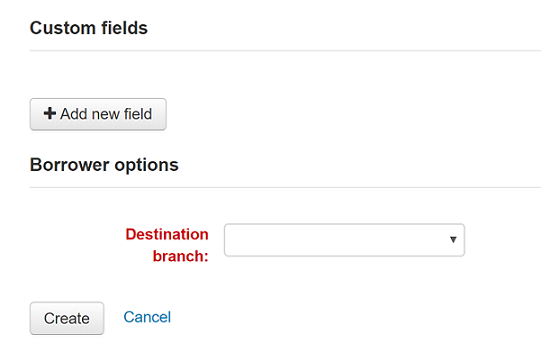
Click on ‚Create‘ to submit your request to the library for processing.
Your submitted request will be listed with a status of ‘New request’. Once processed the status will be updated to ‘Requested’.
Click on ‘View’ to make changes or cancel your request.
You cannot edit the form details but you can add a note to request a modification and then click on ‘Submit modifications’ at the bottom of the screen. Your modification will be sent to the library for processing.
For new requests you will also have the option to ‘Request cancellation’. Your request will be updated with the status ‘Cancellation requested’ and can then be removed by library staff.
Purchase suggestions
If your library has the Anschaffungsvorschlag preference set to ‚Allow‘ then patrons will have the option to make purchase suggestions in several areas in the OPAC.
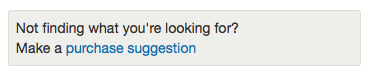
If you are allowing everyone to see the purchase suggestions made by others with the OPACViewOthersSuggestions preference, then there will be a link at the top of your OPAC under the search box.

There will be a link when the patron finds nothing for their search.
And there will be a link on the patron’s Your purchase suggestions tab.

Clicking any one of these links will open the purchase suggestion form.
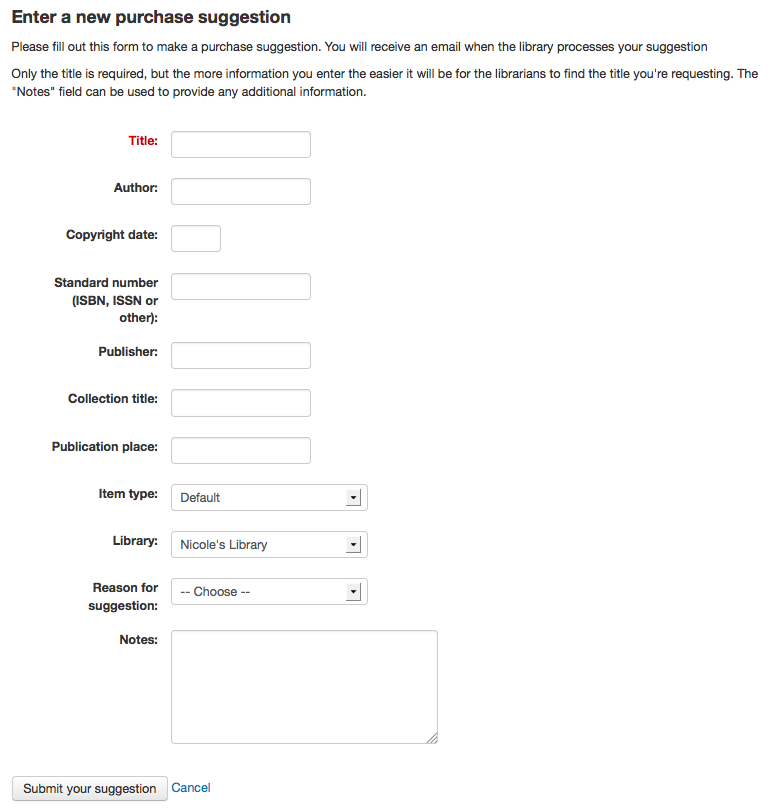
From the form only the ‚Title‘ is required by the library.
The item type list can be edited by editing the SUGGEST_FORMAT authorized value.
If you would like the ‚Reason for suggestion‘ menu shown in the screenshot above to appear on your suggestions list you need to add an authorized value category titled ‚OPAC_SUG‘ and include reasons as values in that list.
If you would like the patron to be able to choose which branch they are making a suggestion for you need to set the AllowPurchaseSuggestionBranchChoice preference to ‚Allow‘
Once the form is submitted the data will be saved to the Acquisitions module for the librarians to manage.